

Are you an outdoor enthusiast who is looking to capture the beauty of nature on camera? If so, a cellular trail camera might be a great option for you. Setting up this type of camera provides an incredible opportunity to remotely monitor and capture images outdoors without having to physically be there. Plus, the convenience of being able to view pictures from anywhere with your phone makes it even better!
With all that said, it can seem overwhelming trying to figure out how to set up a cellular trail camera correctly – but don’t worry; we’re here to guide you through each step with ease! In this blog post on how to set up cellular trail camera, we are going share practical tips and tricks on setting up your trail or game cam correctly so that you can start taking amazing shots!
Needed Materials
Given below is a list of the materials required before you start setting up your cellular trail camera:
- Cellular Trail Camera
- Sd Card
- Batteries
- Mounting Strap or Mount Bracket
- Field Guide or User Manual Specific to Your Camera Model
- Smartphone, Tablet or Computer
11 Step-by-step Guidelines on How to Set Up Cellular Trail Camera
Step 1: Find the Perfect Location
The first and foremost step towards setting up a cellular trail camera is finding the perfect location. You want to make sure the camera is in a strategic spot where it can capture the most activity without being too obvious or exposed. But at the same time, you want to make sure it’s in an area that has a good cellular signal so that you can easily receive images.
Step 2: Choose the Right Camera Mode
Most cellular trail cameras have different modes for various purposes. Make sure to select the correct mode for your specific needs before setting up your camera. Some common modes include photo, video, time-lapse, and burst. It’s important to understand which mode is best for your desired outcome. You can refer to your camera’s field guide or user manual for more details.
Step 3: Insert SD Card and Batteries
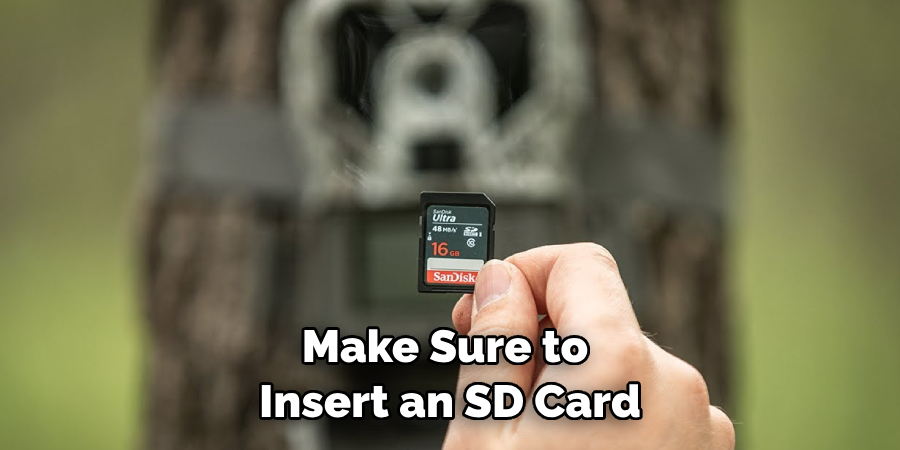
Make sure to insert an SD card into your cellular trail camera before turning it on. This will allow you to store the images captured by the camera. Also, make sure to use high-quality batteries that are compatible with your specific camera model. It’s a good idea to have extra batteries on hand in case the ones in your camera run out of power. You don’t want to miss out on capturing any images!
Step 4: Turn on Your Cellular Trail Camera
Once you have inserted the SD card and batteries, it’s time to turn on your cellular trail camera. Some cameras might require you to enter some basic settings before use, so make sure to follow the instructions given in your field guide or user manual. But in most cases, the camera should be ready to use right away.
Step 5: Set Up Your Cellular Trail Camera’s Settings
Each cellular trail camera has different settings that you can adjust according to your preferences. You can choose the image quality, trigger speed, and detection range, among other things. Make sure to familiarize yourself with these settings before setting up the camera, so you can capture the best quality images. It’s also a good idea to test the settings before leaving the camera unattended.
Step 6: Mount Your Camera
It’s time to mount your cellular trail camera in its designated location. You can use either a mounting strap or a mounting bracket, depending on what is included with your specific camera. Make sure the camera is secure and positioned at the desired angle to capture the best shots.
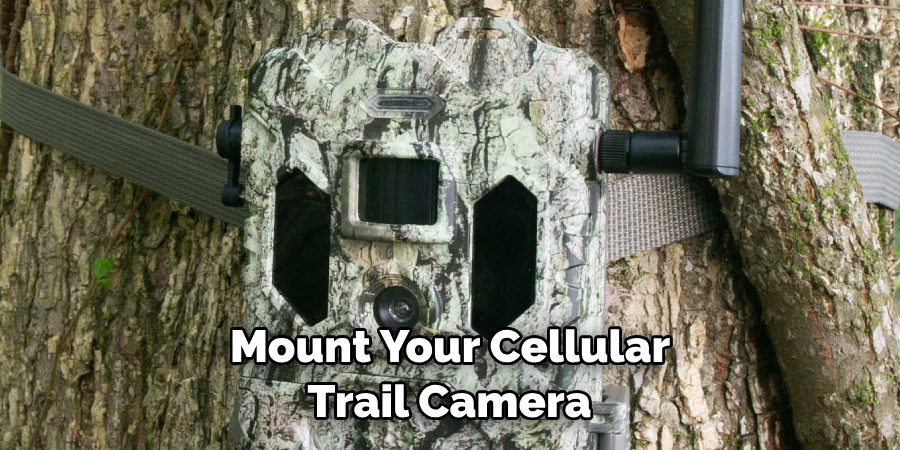
Otherwise, you may end up with blurry or unrecognizable images. It’s also essential to ensure the camera is protected from harsh weather conditions.
Step 7: Check the Cellular Signal
Before leaving your camera unattended, make sure to check the cellular signal strength at the location where you mounted the camera. If the signal strength is weak or non-existent, try moving the camera to a different spot in that area. You can also use a cellular signal booster if you’re struggling to get good reception. It’s necessary to have a reliable signal for the camera to send images.
Step 8: Test Your Camera
Once your camera is all setup and mounted, it’s time to test it out! Walk in front of the camera to trigger it and make sure everything is working correctly. You can also take a test picture or video to ensure the quality is up to your standards. If everything looks good, you’re all set! You can now leave the camera to capture images on its own.
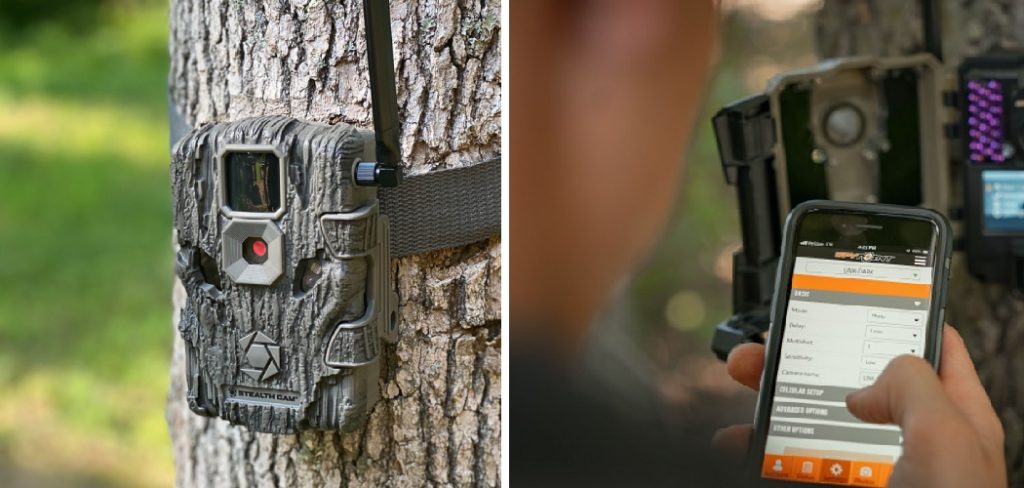
Step 9: Install the App
Most cellular trail cameras have an accompanying app that you can install on your smartphone, tablet, or computer. This app allows you to remotely view and manage your camera, making it easier than ever to receive images and make any necessary adjustments. It’s a good idea to Installthe app before setting up your camera so that you can familiarize yourself with it beforehand.
Step 10: Receive and View Images
Once your cellular trail camera starts capturing images, they will be sent directly to your phone through the app. You can view these images at any time, no matter where you are! The convenience of being able to remotely monitor your camera is one of the best features of a cellular trail cam. Make sure to check for any updates or issues regularly. You can also use the app to manage your camera settings remotely.
Step 11: Retrieve Your Camera and Images
After a period of time, you will need to retrieve your cellular trail camera. Make sure to turn off the camera, remove the SD card, and save any necessary images before taking it down. You can use these images to analyze data, track a particular animal or pattern of movement, and make future decisions on where to set up your camera for better results.
Follow these eleven simple steps on how to set up cellular trail camera, and you’ll have your cellular trail camera set up in no time! With this advanced technology, you can easily and remotely capture images of wildlife or other activities that you wouldn’t be able to see otherwise.
Whether it’s for hunting, research, or simply personal enjoyment, a cellular trail camera is an excellent investment for any outdoor enthusiast. So what are you waiting for? Find the perfect location and start setting up your camera! Happy trail camming!
Additional Tips
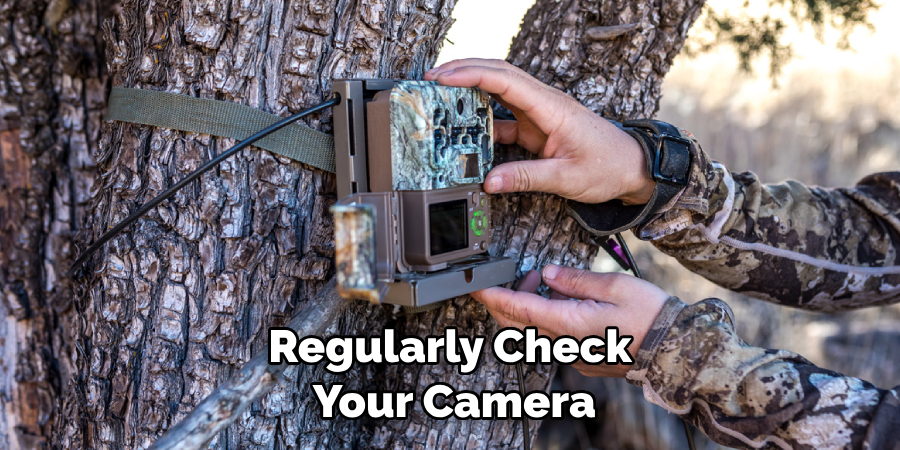
- Make Sure to Regularly Check Your Camera and Its Settings for Optimal Performance.
- It’s a Good Idea to Clear the Sd Card of Old Images Before Each Use to Avoid Running Out of Storage Space.
- Remember to Always Follow Local Laws and Regulations When Setting Up Your Cellular Trail Camera.
- Some Cellular Trail Cameras Have Additional Features Such as GPS or Temperature Sensors. Familiarize Yourself With These Features to Make the Most Out of Your Camera.
- Don’t Be Afraid to Experiment With Different Settings and Locations for Your Camera. This Will Help You Find the Best Results for Your Specific Needs. Remember, Every Location is Unique, So What Works for Someone Else Might Not Work for You.
- Lastly, Have Fun! Setting Up and Using a Cellular Trail Camera is an Exciting and Rewarding Experience. Enjoy Capturing the Fascinating World of Wildlife in Your Own Backyard or Out in Nature. Happy Trail Camming! Remember to Be Respectful of the Environment and the Creatures You Are Observing. Now Get Out There and Set Up Your Very Own Cellular Trail Camera!
Frequently Asked Questions
Q1: Can I Use a Cellular Trail Camera Without a Cellular Plan?
A1: Yes, you can still manually retrieve images from the SD card even without a cellular plan. However, using a cellular plan allows for remote image viewing and management. It also eliminates the need for frequent manual retrieval of data from the camera.
Q2: How Long Do Batteries Last in a Cellular Trail Camera?
A2: The battery life can vary depending on usage, temperature, and battery type. However, most cellular trail cameras have a battery life of 3-6 months. But it’s always a good idea to have extra batteries on hand in case of unexpected weather conditions or heavy usage.
Q3: Can I Use a Cellular Trail Camera for Security Purposes?

A3: Yes, cellular trail cameras can also be used for security purposes. With its remote viewing capabilities, you can monitor your property or assets from anywhere. Some models even come with motion detection and security features, making them a reliable surveillance tool. So don’t limit yourself to just wildlife photography with your cellular trail camera! The possibilities are endless.
Q4: Can I Use My Own SIM Card for a Cellular Trail Camera?
A4: It is possible to use your own SIM card for a cellular trail camera, but it’s not recommended. Most cellular trail cameras come with a built-in SIM card and are designed to work with specific networks. Using your own SIM card may result in compatibility issues and affect the functionality of the camera.
Conclusion
So there you have it, now you know the basics of how to set up cellular trail cameras. It can be a daunting process at first, but with research and confidence, anyone can set one up easily.
And by being prepared with the right components and technology you can start taking stunning wildlife photos in no time! What’s even better is that you don’t need to worry about constantly checking your camera either as it’s all operated through your phone or computer.
So, if capturing amazing images of wildlife is something you’re keen on doing, then why not take the plunge and set up your own cellular trail camera today? By having all this knowledge in hand, you are sure to be successful in doing so – and who knows what incredible shots you may get!
About
Safety Fic is a distinguished figure in the world of Diy design, with a decade of expertise creating innovative and sustainable Diy solutions. His professional focus lies in merging traditional craftsmanship with modern manufacturing techniques, fostering designs that are both practical and environmentally conscious. As the author of diy, Safety Fic delves into the art and science of Safety Fic-making, inspiring artisans and industry professionals alike.
Education RMIT University
(Melbourne, Australia) Associate Degree in Design (Safety Fic) Focus on sustainable design, industry-driven projects, and practical craftsmanship. Gained hands-on experience with traditional and digital manufacturing tools, such as CAD and CNC software.
Nottingham Trent University
(United Kingdom) Bachelor’s in diyfastly.com and Product Design (Honors) Specialized in product design with a focus on blending creativity with production techniques. Participated in industry projects, working with companies like John Lewis and Vitsoe to gain real-world insights.
Publications and Impact
In diy, Safety Fic his insights on indoor design processes, materials, and strategies for efficient production. His writing bridges the gap between artisan knowledge and modern industry needs, making it a must-read for both budding designers and seasoned professionals.