

Setting up a Lutron motion sensor switch can be an easy and convenient way to add convenience and security to your home. Motion sensors detect movement in the area, allowing certain lights or electrical appliances to turn on or off automatically when someone moves into the range of the sensor.
The advantages of installing a Lutron motion sensor switch are numerous. Motion sensors can turn lights on and off automatically when someone moves into the range of the sensor. This allows you to save energy by only having lights on when needed.
Since these switches don’t require manual operation, they can also reduce the risk of leaving lights on when no one is around. In this blog post, You will learn in detail how to set up lutron motion sensor switch.
Step-by-Step Processes for How to Set Up Lutron Motion Sensor Switch
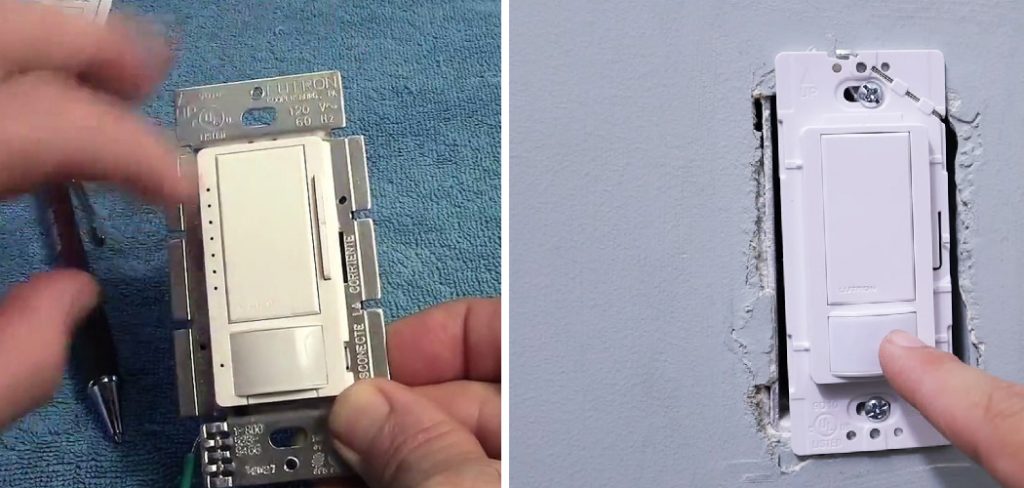
Step 1: Inspect the Box
Before you begin, make sure to take a look at the box and see what components are included. The motion sensor switch should come with mounting screws, brackets, an instruction manual, and a wire connector for connecting to your home’s existing wiring.
Step 2: Install the Mounting Bracket
Once you have all the components ready, locate the mounting bracket and install it to the wall or ceiling where your light switch will be. After you have mounted the bracket, connect your existing wiring to the motion sensor switch.
Step 3: Attach the Motion Sensor to the Mounting Bracket
With your wiring connected, attach the motion sensor to the mounting bracket. Once your motion sensor switch is attached to its bracket, install the cover on top of it. The motion sensor settings come preset from the factory. However, you can customize these settings using the included instruction manual or online tutorial videos.
Step 4: Test the Motion Sensor
Once your settings are set, test the motion sensor by standing before it and observing if it responds as expected. After testing that your motion sensor works properly, power on the circuit breaker to ensure that your switch is ready for use.
Step 5: Verifying Installation
After powering the circuit breaker, verify that your motion sensor switch is running properly. Now it’s time to start enjoying the convenience of installing a motion sensor switch in your home.

Now that you know how to set up a Lutron motion sensor switch, you can improve the convenience and security of your home and save energy in the process. With this guide, setting up a Lutron motion sensor switch is an easy task that anyone can do.
Tips for How to Set Up Lutron Motion Sensor Switch
- Before making any changes to the wiring or installation of your motion sensor switch, always turn off the power to the circuit breaker.
- Ensure you have all the necessary components before beginning the installation process.
- Follow all instructions carefully when setting up your motion sensor switch, and read through any online tutorials for further help.
- Test the motion sensor switch before powering on the circuit breaker to ensure it works properly.
- Use caution when handling wiring; only attempt to do electrical work if you are qualified and experienced.
- If you have children in your home, consider installing a safety guard to prevent them from playing with the motion sensor switch.
Following these tips and steps, you can easily set up your Lutron motion sensor switch quickly. With this setup, you will enjoy the convenience of having lights turn on and off automatically when someone moves into the range of the sensor.
How Do You Configure Your Lutron Motion Sensor Switch?
Getting your Lutron motion sensor switch up and running is easy! Just follow these simple steps:

- Start by opening the faceplate of your Lutron switch. You’ll need to use a screwdriver for this part.
- Remove the existing wiring from the terminals on the back of your switch, then attach the new wires according to the instructions with your Lutron switch.
- Once you’ve connected all the wires, replace the faceplate and secure it with the screws you removed earlier.
- Now it’s time to program your Lutron motion sensor switch! You can do this using a preset schedule or manually setting up an occupancy timer.
- If you choose to use the preset schedule, select the settings that best suit your needs, and you’re done.
- To manually set up an occupancy timer, press and hold the bottom left button for five seconds until a blue LED light turns on. Then, adjust the settings according to your preferences.
- Once you’ve finished adjusting the settings, press and hold the bottom left button for another five seconds to save your changes.
- Finally, turn on the power switch to activate your Lutron motion sensor switch.
Now, you can enjoy convenient lighting that turns on automatically when movement is detected in a room – no need to flip any switches.
What Are Some Potential Problems You Might Run Into During Installation of Your Lutron Motion Sensor Switch?
When wiring and installing your Lutron motion sensor switch, there are a few potential problems to be aware of. First, if the power supply isn’t strong enough or the circuit breaker is too low, then you may find that your switch doesn’t work properly. Another issue might arise if the wall box installed for the switch is too shallow or too large.

If either of these issues is present, you may need to change the mounting hardware in the kit to ensure a proper fit and secure installation. Finally, suppose your switch is installed in an area with high levels of humidity or temperatures that fall below freezing. In that case, you should consider installing a dedicated ground fault circuit interrupter (GFCI) for safety and program your Lutron motion sensor .
What is the Best Way to Troubleshoot Any Issues With Your Lutron Motion Sensor Switch Setup?
If you are having difficulty with your Lutron motion sensor switch setup, the best way to troubleshoot is to start by checking the wiring. Ensure all connections are secured, and the power supply matches the correct voltage in the installation manual.
If everything looks good, try resetting your switch using a small reset tool or manually pressing the switch’s reset button. If all else fails, consulting a licensed electrician may be your best option to get your Lutron motion sensor switch operating again.
Are There Any Tips to Make Installation of Your Lutron Motion Sensor Switch Easier?
When installing your Lutron motion sensor switch, a few tips can make the process easier. Firstly, review all instructions before beginning installation. This will help ensure you have all the necessary tools and supplies.
Secondly, turning off power at your circuit breaker before beginning wiring work is always a good idea. Finally, if possible, keep the switch in an area with plenty of fresh air to prevent overheating. With these tips, you can easily install your Lutron motion sensor switch and enjoy its convenience and security.
How Often Should You Check Your Lutron Motion Sensor Switch For Maintenance?
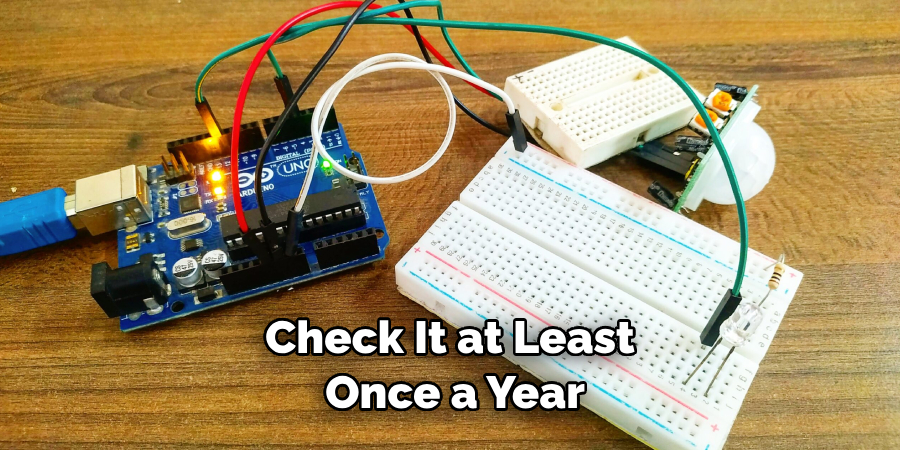
To ensure your Lutron motion sensor switch is operating optimally, you should check it at least once a year. During this maintenance check, inspect the wiring for any signs of damage or corrosion and verify that all connections are secure. Be sure to also look for any signs of flickering or other indicators that could point to a faulty component within the switch.
Finally, you should test your motion sensor switch by triggering it with a wave to ensure it works properly. Following these tips will help ensure you get the most out of your Lutron motion sensor switch and can use it without worry.
What Kind of Maintenance Should You Regularly on Your Lutron Motion Sensor Switch?
To keep your Lutron motion sensor switch working properly, it’s important to take a few basic steps for regular maintenance. First, ensure the wiring within the wall box is secure, and all connections are tightened. Check any mounting hardware or screws used in the installation process to ensure they remain tight and secure.
Additionally, you should regularly clean the lens of the switch with a damp cloth to remove any dust or dirt that may have accumulated. Finally, if you’re using batteries in your switch, replace them every six months to ensure optimal performance. By taking these simple steps regularly, you can help extend the life of your Lutron motion sensor switch and keep it working properly for years to come.
Conclusion
In conclusion, setting up your Lutron motion sensor switch is easy and can be done in just a few steps. Following the instruction manual, you can easily install and adjust your motion sensor switch to suit your needs. Once installed, these switches offer convenience and energy savings while keeping your home secure.
With the help of a reliable motion sensor switch from Lutron, you can be sure that you will always have a secure and automated home. This article has been beneficial for learning how to set up lutron motion sensor switch. Make Sure the precautionary measures are followed chronologically.
About
Safety Fic is a distinguished figure in the world of Diy design, with a decade of expertise creating innovative and sustainable Diy solutions. His professional focus lies in merging traditional craftsmanship with modern manufacturing techniques, fostering designs that are both practical and environmentally conscious. As the author of diy, Safety Fic delves into the art and science of Safety Fic-making, inspiring artisans and industry professionals alike.
Education RMIT University
(Melbourne, Australia) Associate Degree in Design (Safety Fic) Focus on sustainable design, industry-driven projects, and practical craftsmanship. Gained hands-on experience with traditional and digital manufacturing tools, such as CAD and CNC software.
Nottingham Trent University
(United Kingdom) Bachelor’s in diyfastly.com and Product Design (Honors) Specialized in product design with a focus on blending creativity with production techniques. Participated in industry projects, working with companies like John Lewis and Vitsoe to gain real-world insights.
Publications and Impact
In diy, Safety Fic his insights on indoor design processes, materials, and strategies for efficient production. His writing bridges the gap between artisan knowledge and modern industry needs, making it a must-read for both budding designers and seasoned professionals.