

Properly sealing doors is crucial to improving energy efficiency and maintaining a comfortable indoor environment. Air leaks around doors can make your heating and cooling systems work harder, increasing energy bills and uneven indoor temperatures. Common signs of air leakage include noticeable drafts, a sudden spike in utility costs, and difficulty maintaining a consistent room temperature.
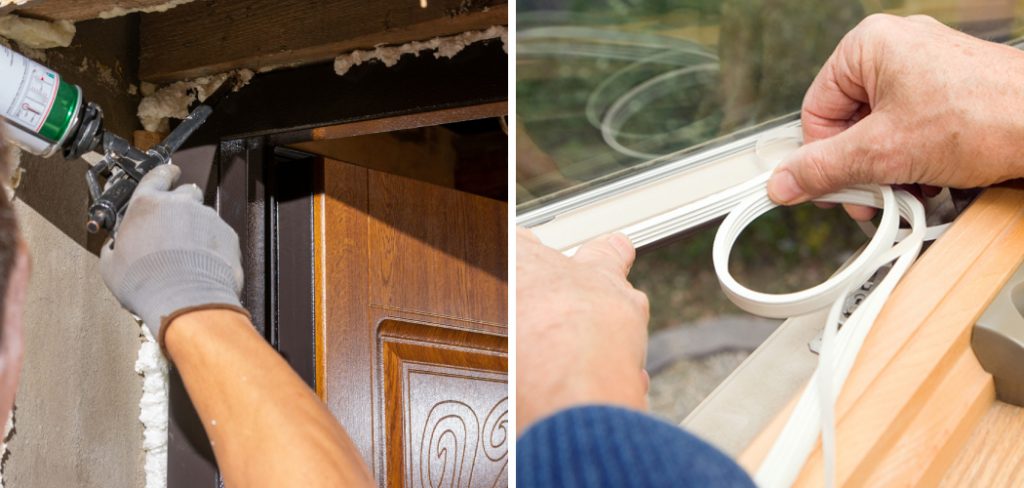
In this article, we’ll explore various methods on how to stop air from leaking around a door, including assessing and measuring air leaks, choosing and installing the right weatherstripping, sealing gaps and cracks, and performing regular tests and maintenance. By following these steps, you can effectively prevent air leaks, thereby enhancing your home’s energy efficiency and comfort.
Assessing Air Leaks
Identifying Common Leakage Points
To effectively stop air from leaking around a door, it’s essential to first pinpoint the common leakage points. Start by checking for gaps around the door frame, under the door, and between the door and the threshold. Inspecting these areas can reveal gaps where air might escape or enter your home. One practical method for detecting drafts is to use a candle or smoke pencil. By moving the candle or smoke pencil around the door frame and observing the movement of the flame or smoke, you can identify locations where air is leaking. Any erratic movement of the flame or smoke will indicate the presence of drafts, allowing you to target areas that need sealing.
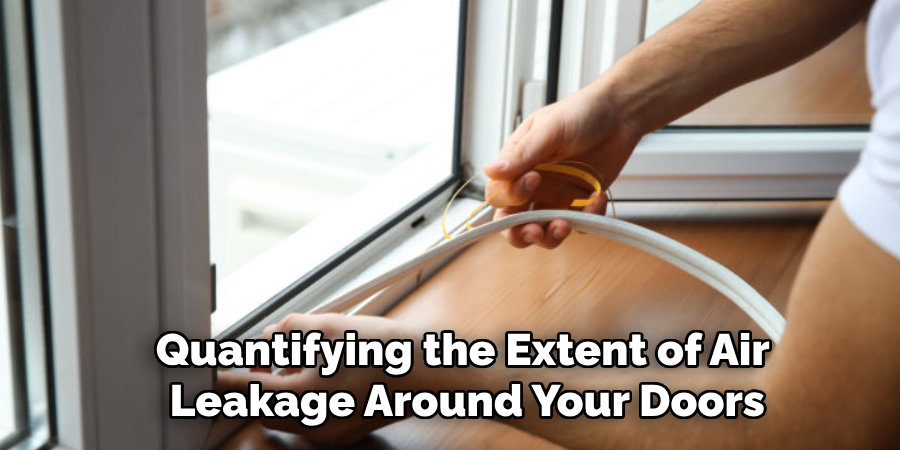
Measuring Air Leakage
Quantifying the extent of air leakage around your doors can help prioritize the areas needing attention. You can measure the air leakage rate using a thermal leak detector or anemometer. A thermal leak detector can help visualize temperature differences, highlighting spots where cold or hot air is seeping through. An anemometer measures airflow, providing precise readings of how much air leaks through specific points. By identifying and measuring these areas, you can focus on the most significant leaks, ensuring a more thorough and effective sealing process.
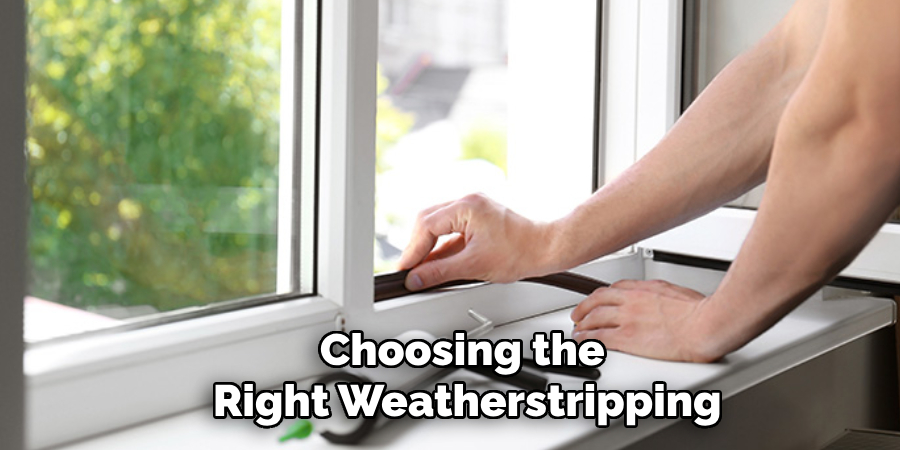
How to Stop Air from Leaking Around a Door: Choosing the Right Weatherstripping
Selecting the appropriate weatherstripping is essential to effectively stop air from leaking around a door. Different types of weatherstripping materials offer various levels of durability, ease of installation, and effectiveness. Here’s an overview of some common types:
- Felt: Felt weatherstripping is one of the oldest and most affordable options. It is easy to cut and install, but it tends to wear out quickly and may not be the best for high-traffic areas. Felt is generally used in lower-demand sealing tasks.
- Foam: Foam weatherstripping is available in several forms, including open-cell and closed-cell. It is inexpensive, easy to install, and works well for irregularly shaped gaps. However, foam can degrade over time, especially when exposed to moisture.
- Vinyl: Vinyl weatherstripping is durable and offers excellent durability and effectiveness. It’s typically installed in metal or wood channels and is commonly used in door sweeps. Vinyl is moisture-resistant and can maintain its shape for a long time.
- Rubber: Rubber weatherstripping, including EPDM and silicone rubber, provides high durability and seals effectively against air and moisture. Rubber strips are often used in more demanding applications due to their resilience.
- Metal: Metal weatherstripping, such as bronze or aluminum, offers superior durability and is often installed permanently. While metal can be more challenging to install, it remains highly effective for sealing doors and lasts many years.
Choosing the right weatherstripping depends on your door’s specific needs and the conditions it will face. Vinyl or rubber may be the best options for high-durability and moisture-resistant needs. Feeling or foam could be suitable if ease of installation is a priority.
Installing Weatherstripping
Proper weatherstripping installation ensures an effective seal around the door frame and bottom edge. Here are the steps to apply weatherstripping:
- Clean the Surface: Begin by thoroughly cleaning the areas where the weatherstripping will be applied. Remove any dirt, dust, and old adhesive to ensure proper adhesion.
- Measure and Cut: Use a measuring tape to determine the length of weatherstripping needed for each section of the door frame and the bottom edge. Cut the weatherstripping to the appropriate length using scissors or a utility knife.
- Apply Adhesive: Depending on the type of weatherstripping, apply adhesive backing to the cut pieces. For metal or nail-on weatherstripping, align the strips and prepare for installation with screws or nails.
- Align and Install: Carefully align the weatherstripping along the door frame and door bottom. Press firmly to ensure a tight seal. For adhesive-backed weatherstripping, press down along the entire length of the strip to secure it in place.
- Test the Seal: Close the door to test the effectiveness of the weatherstripping. Ensure that there are no visible gaps and that the door closes smoothly.
Replacing Worn Weatherstripping
Over time, weatherstripping can become less effective as it wears out through regular use. Recognizing the signs of worn weatherstripping and knowing how to replace it is vital for maintaining a proper seal.
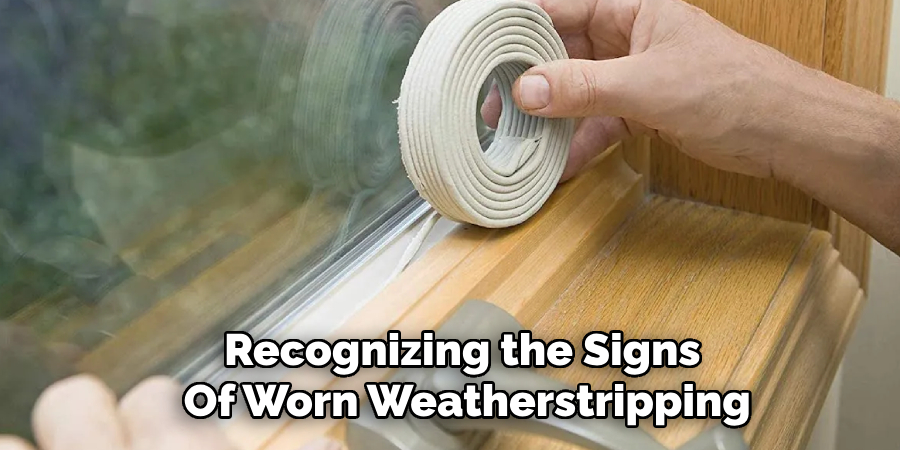
Signs of Worn Weatherstripping:
- Cracking or peeling of the material.
- Compression of foam or rubber, making it less resilient.
- Visible gaps or increased drafts around the door.
Steps to Replace Old Weatherstripping:
- Remove Old Weatherstripping: Take off the old weatherstripping by carefully peeling or prying it away from the door frame. Use a scraper or putty knife to remove any remaining adhesive or nails.
- Clean the Surface: Once the old weatherstripping is removed, clean the door frame thoroughly to remove any residual adhesive or debris.
- Prepare New Weatherstripping: Measure and cut the new weatherstripping to the required lengths for each door section.
- Install New Weatherstripping: Apply the new weatherstripping following the steps outlined in the installation section. Ensure proper alignment and firm adherence to achieve an effective seal.
- Test the Seal: Finally, close the door to ensure that the new weatherstripping fits snugly and effectively seals any gaps. Adjust as necessary to make sure there are no drafts.
By choosing the right type of weatherstripping and installing it correctly, you can significantly reduce air leakage around your door, improving energy efficiency and comfort in your home.
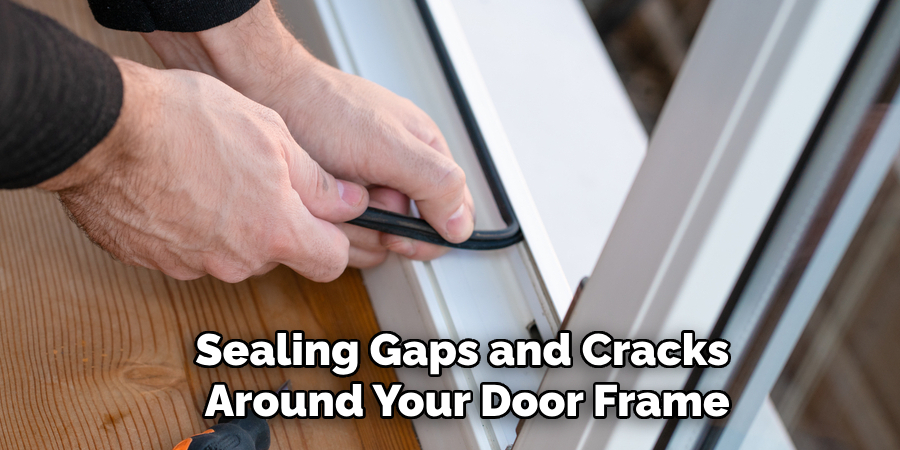
How to Stop Air from Leaking Around a Door: Sealing Gaps and Cracks
Sealing gaps and cracks around your door frame is essential in ensuring energy efficiency and indoor comfort. One of the most effective ways to accomplish this is by using caulk or sealant to close any openings that allow drafts, moisture, or pests to infiltrate your home. Before starting, inspecting the door frame thoroughly is important, as well as identifying all cracks and gaps that need sealing. Minor gaps, which appear along the door frame trim or between the frame and the wall, can be addressed effectively with a high-quality caulk or sealant.
Using Caulk or Sealant
Choosing the Right Caulk
Selecting the right type of caulk is crucial for achieving a durable and effective seal. The most common varieties of caulk used for door frames and trim include silicone, acrylic, and latex-based caulk:
- Silicone Caulk: Known for its flexibility and durability, silicone caulk is resistant to shrinking and cracking. It adheres well to non-porous surfaces such as metals and glass, making it ideal for exterior door frames that are exposed to the elements.
- Acrylic Caulk: Easier to apply and clean up than silicone, acrylic caulk can be painted over once it dries, which makes it a good choice for interior applications where aesthetic considerations are important.
- Latex-Based Caulk: Featuring easy application and clean-up with water, latex-based caulk is a versatile option for interior and exterior use. It offers good adhesion and flexibility, although it may not be as long-lasting as silicone.
Techniques for Applying Caulk
Proper application of caulk is vital for ensuring an effective seal. Follow these steps for the best results:
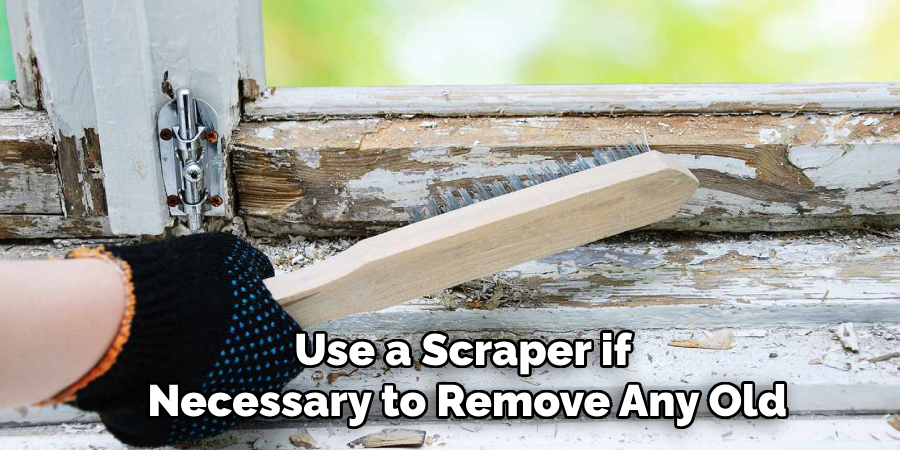
- Clean the Surface: Ensure the area to be caulked is clean and free of debris, old caulk, and dust. Use a scraper if necessary to remove any old, deteriorated caulk.
- Cut the Nozzle: For better control, cut the tip of the caulk tube at a 45-degree angle, choosing a size that matches the width of the gap you are sealing.
- Apply the Caulk: Load the caulk tube into a caulk gun and apply a steady bead along the length of the gap or crack. Aim to maintain constant pressure on the trigger for a consistent application.
- Smooth the Caulk: Use a caulk smoothing tool or a wet finger to smooth the bead of the caulk, ensuring it fills the gap completely and adheres well to both sides.
- Let it Dry: Allow the caulk to cure fully based on the manufacturer’s instructions, typically at least 24 hours.
Adding Door Sweep
Adding a door sweep is an effective method to seal the gap between the bottom of the door and the threshold, preventing drafts, dirt, and insects from entering your home. Door sweeps come in a variety of materials and designs, so it’s important to choose one that matches your door type:
- Selecting the Sweep: Choose a door sweep made from durable materials such as rubber, vinyl, or metal. For wooden doors, consider sweeps with adhesive backing for easy installation. For metal or fiberglass doors, select sweeps that screw into the bottom of the door.
- Installation Process:
- Measure and Cut: Measure the width of your door and cut the sweep to size if needed. Many sweeps come with pre-drilled holes and screws for easy installation.
- Attach the Sweep: Attach the sweep to the bottom edge of the door, ensuring it makes firm contact with the threshold when the door is closed. Secure it with screws for a robust fit.
- Test and Adjust: Close the door to check the seal. Make necessary adjustments to ensure there are no gaps and the door moves smoothly.
Repairing Thresholds and Door Jambs
A well-maintained threshold and door jamb are essential for preventing drafts and ensuring your door seals tightly. Damaged thresholds or door jambs should be repaired or replaced promptly to maintain the integrity of your door’s seal.
- Identify Damage: Inspect the threshold and door jamb for cracks, rot, or other damage. Look for signs of wear that compromise the seal.
- Remove Old Threshold/Jamb: If replacement is needed, carefully remove the old threshold or damaged sections of the door jamb. Use appropriate tools such as a pry bar or saw.
- Prepare Surface: Clean and prepare the surface where the new threshold or jamb will be installed. Remove debris, old nails, and adhesive to ensure a smooth and level base.
- Install and Seal: Fit the new threshold or door jamb pieces into place, securing them with screws or nails. Apply caulk around the edges to create a watertight seal.
- Test the Fit: Close the door to ensure the new threshold or door jamb aligns properly, providing a tight seal around the entire perimeter. Adjust as needed to eliminate any gaps.
By following these steps, you can significantly improve your home’s energy efficiency, ensuring comfort and reducing energy bills. Proper sealing techniques, the right materials, and careful installation are key to maintaining effective barriers against the elements.
Testing and Adjusting
Testing for Air Leaks
Conduct thorough tests for air leaks to verify the effectiveness of your weatherstripping and sealants. A straightforward method is the smoke test: Close all windows and doors and hold a lit incense stick near the edges of the door frame. If the smoke wavers or is drawn toward a specific area, it indicates a leak. Alternatively, you can feel for drafts by slowly moving your hand along the door frame, especially on windy days.
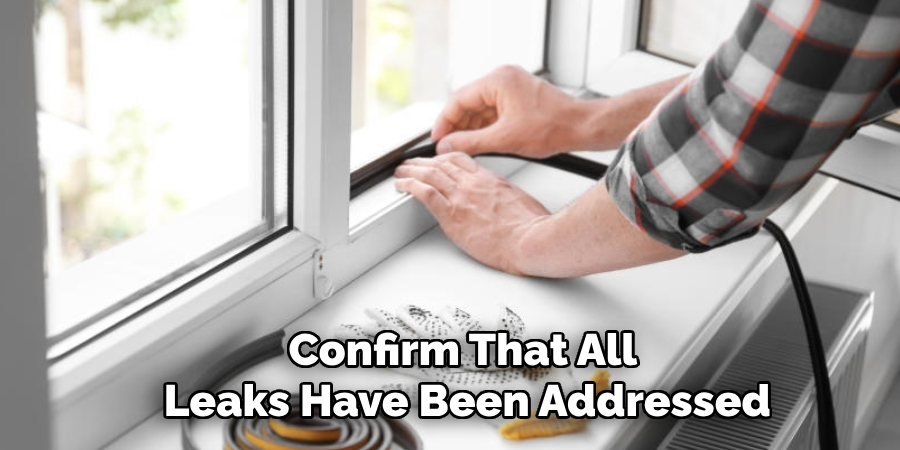
Making Adjustments
Adjust your weatherstripping, caulk, or door sweeps if you identify any leaks during testing. Begin by reapplying or smoothing out caulk where gaps are evident. Adjust the door sweep to ensure it makes firm contact with the threshold, eliminating any gaps. Re-test the area to confirm that all leaks have been addressed. Proper adjustments and repeated testing help ensure you maintain an effective barrier against drafts and moisture.
Maintenance Tips
Regular inspection and maintenance of your weatherstripping and seals are essential to ensure their effectiveness. Schedule seasonal checks to reinforce or replace weatherstripping as necessary. Look for signs of wear, such as cracks or gaps, and address them promptly to prevent drafts and moisture infiltration. Keep seals clean by wiping them down with a damp cloth to remove dirt and debris, which can degrade their performance over time. By staying proactive with these simple maintenance tasks, you can extend the life of your weatherstripping and maintain a comfortable and energy-efficient home environment.
Professional Help and Support
When to Hire a Professional
While many door sealing and weatherization tasks can be tackled as DIY projects, there are situations where hiring a professional is advisable. If you encounter severe damage to your door structure, significant air leaks that DIY methods cannot resolve, or lack of time or expertise, consulting a professional is beneficial.
Services Offered
Insulation specialists and contractors provide comprehensive services, including advanced air leak detection, professional caulking, and installation of high-quality weatherstripping and door sweeps. They ensure all components are correctly fitted and perform optimally.
Costs and Time
Professional sealing services typically range from $100 to $300, depending on the extent of work and materials used. The process usually takes a few hours to a day, ensuring thorough and effective sealing.
Conclusion
In conclusion, learning how to stop air from leaking around a door involves several key steps: installing efficient door sweeps, repairing thresholds and door jambs, testing for air leaks, and making necessary adjustments. The process starts with selecting the appropriate sweep and ensuring correct installation. Follow up with repairing or replacing damaged thresholds and door jambs to maintain a snug fit. Conduct regular tests for air leaks and make adjustments as needed to achieve a thorough seal.
Enhanced energy efficiency reduces utility costs and creates a more comfortable living environment, free from drafts and moisture. By proactively sealing your doors, you can improve your home’s overall energy performance, making it cozier in the winter and cooler in the summer. Don’t wait—take action now to seal your doors effectively and enjoy the numerous benefits of a well-insulated home.
About
Safety Fic is a distinguished figure in the world of Diy design, with a decade of expertise creating innovative and sustainable Diy solutions. His professional focus lies in merging traditional craftsmanship with modern manufacturing techniques, fostering designs that are both practical and environmentally conscious. As the author of diy, Safety Fic delves into the art and science of Safety Fic-making, inspiring artisans and industry professionals alike.
Education RMIT University
(Melbourne, Australia) Associate Degree in Design (Safety Fic) Focus on sustainable design, industry-driven projects, and practical craftsmanship. Gained hands-on experience with traditional and digital manufacturing tools, such as CAD and CNC software.
Nottingham Trent University
(United Kingdom) Bachelor’s in diyfastly.com and Product Design (Honors) Specialized in product design with a focus on blending creativity with production techniques. Participated in industry projects, working with companies like John Lewis and Vitsoe to gain real-world insights.
Publications and Impact
In diy, Safety Fic his insights on indoor design processes, materials, and strategies for efficient production. His writing bridges the gap between artisan knowledge and modern industry needs, making it a must-read for both budding designers and seasoned professionals.