

Testing a taser is an essential process to ensure its functionality, reliability, and safety. Whether for law enforcement, self-defense, or professional use, it is crucial to handle and test the device responsibly. This guide will outline the key steps and considerations for how to test a taser. In this blog post, we’ll walk you through the steps on how to test a taser so that you can get back to using it in no time! So grab your tools, and let’s get started!

Why Testing a Taser Is Important
Testing a taser is critical for several reasons, particularly when considering safety and preparedness. First and foremost, it ensures that the device is functioning correctly and will perform as intended in a situation where it may be urgently needed. A malfunctioning taser could fail to protect the user or diffuse a potentially dangerous situation.
Regular testing also helps identify any technical issues, such as battery problems or electrode damage, which can compromise its effectiveness. Additionally, routine testing allows the user to familiarize themselves with the taser’s operation, boosting confidence and readiness in high-pressure scenarios. Ensuring a taser is in optimal condition not only protects the user but also promotes responsible ownership and use.
Safety Precautions Before Testing
Before testing a taser, it is crucial to follow specific safety precautions to ensure the process is conducted responsibly and without unnecessary risk. Start by confirming the taser is unloaded or in a non-lethal test mode to prevent accidental discharge. Always perform the test in a controlled environment, away from people, pets, or flammable materials.
Wearing protective gear, such as safety goggles, is recommended to guard against unexpected sparks or debris. Additionally, check the surrounding area to ensure no electronic devices are near, as the electrical pulse could potentially interfere with or damage them. By adhering to these precautions, the testing process can be carried out safely and efficiently.
Tools and Materials Needed
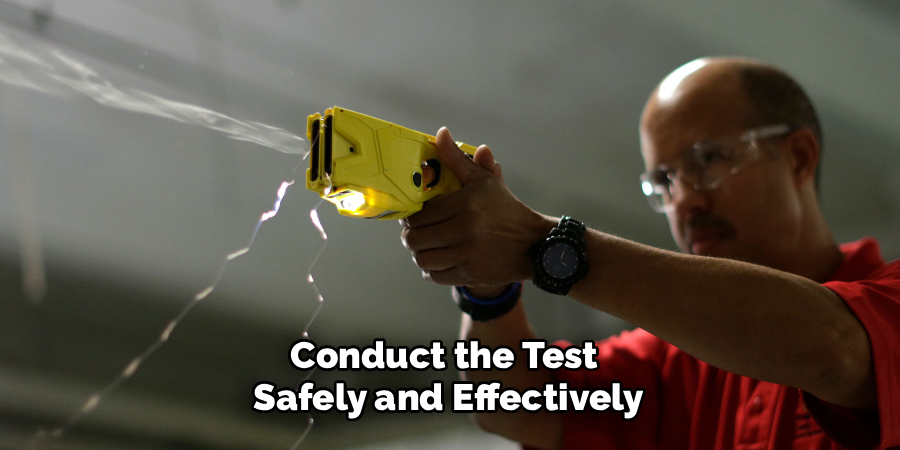
To conduct the test safely and effectively, gather the following tools and materials beforehand:
- Multimeter – To measure electrical values such as voltage, current, or resistance if required during the process.
- Protective Gear – Safety goggles, insulated gloves, and any protective clothing to ensure personal safety.
- Insulated Screwdrivers – For handling electrical components without the risk of electric shock.
- Test Leads and Clips – To establish secure connections during the testing procedure.
- Voltage Tester – To verify the presence of electrical current at specific points.
- Non-Flammable Work Surface – A stable, insulated area to conduct the test and place tools.
- Flashlight – For better visibility if working in dimly lit areas.
- First Aid Kit – As a precautionary measure in case of minor injuries.
Having these tools and materials readily available will ensure a smooth and secure testing process.
10 Methods How to Test a Taser
1. Visual Inspection Before Testing
Before any electrical test, a thorough visual inspection of the Taser is essential. Begin by checking the device for any visible damage, such as cracks in the casing, exposed wires, or corrosion on the metal components. Confirm that the cartridge is properly seated and that the safety mechanism is engaged. Inspect the battery to ensure it is fully charged or has sufficient power. This step ensures that the Taser is safe to handle and reduces the risk of malfunction during testing. Skipping this preliminary inspection could result in inaccurate test results or, worse, accidental discharge.
2. Check the Battery Status
A Taser relies on a charged power source to deliver a proper electric charge. Most modern Tasers include a battery indicator or an LED light signaling power levels. If your Taser does not have a visual indicator, consider using a multimeter to measure the voltage of the battery. Replace or recharge batteries that show low voltage. Testing a Taser with weak batteries will not only give misleading results but may also cause the device to fail in a critical situation. Regular battery checks are therefore a crucial preparatory step.
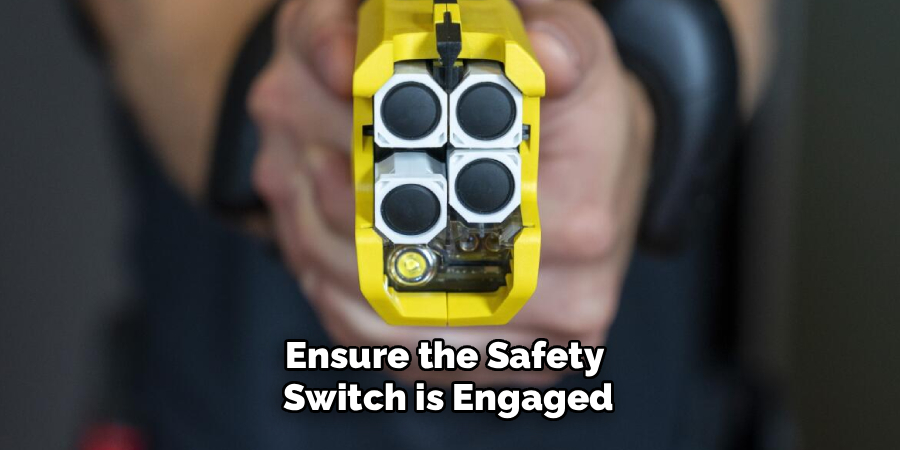
3. Engage the Safety Mechanism
Before testing, ensure the safety switch is engaged. The safety prevents accidental activation while inspecting or handling the device. It also allows you to simulate Taser use without triggering the full electrical discharge in unsafe directions. Understanding how the safety switch functions is critical, as improper handling could lead to unintentional shocks or injury during testing. Always confirm that the safety mechanism is fully operational before moving on to live tests.
4. Use a Practice Cartridge
Many Tasers come with practice or training cartridges that emit sparks and sound effects without delivering a real electrical shock. These cartridges allow users to verify the device’s functionality safely. Insert the practice cartridge and activate the Taser while pointing it at a safe surface, such as a thick foam mat or a non-conductive target. Observe whether the device emits the expected sparks and sound. This method is highly recommended for first-time testers or for demonstrations where safety is a priority.
5. Test on a Conductive Target
For a more realistic test, use a controlled conductive target designed for Taser testing, such as a Taser-specific testing pad or a piece of conductive rubber. These targets safely simulate human resistance, allowing you to measure the device’s electrical output without causing harm. Activate the Taser and note the intensity and duration of the spark or arc produced. This method provides insight into the device’s performance under conditions similar to actual use, ensuring reliability in emergencies.
6. Measure Output Voltage and Current
For technical testing, measuring the Taser’s electrical output is crucial. Use a voltmeter and an ammeter rated for high-voltage measurement to gauge the voltage and current generated by the device. Most Tasers operate at tens of thousands of volts but very low amperage to prevent permanent injury. Carefully follow manufacturer instructions to avoid electrical shock. Measuring output ensures the Taser meets performance specifications and has not degraded due to age, battery issues, or internal damage.

7. Simulate a Trigger Pull
After confirming the battery, safety, and basic functionality, simulate the trigger pull as it would occur in a real scenario. Keep the Taser pointed at a safe testing target or surface while activating it for the typical duration recommended by the manufacturer. Observe the duration of electrical discharge and ensure consistent operation across multiple activations. This test confirms the mechanical function of the trigger mechanism and the timing of the electrical pulses. Any hesitation or inconsistency may indicate internal mechanical or electrical issues.
8. Check Laser and Light Alignment
Many Tasers feature an integrated laser or flashlight to assist with targeting. Testing these components ensures the device is ready for practical use. Activate the laser and light features, and check for proper alignment with the target area. Misaligned lasers can reduce the effectiveness of aiming during real-world scenarios, and faulty lights can hinder visibility in low-light situations. Ensuring these auxiliary functions are working correctly complements the primary electrical testing of the Taser.
9. Evaluate Taser Safety Indicators
Modern Tasers include multiple safety indicators, such as LED signals that display charge status, cartridge readiness, or malfunction warnings. Activate the Taser and observe whether these indicators function as intended. Test the response of these indicators under different conditions, including low battery and cartridge removal. Proper operation of safety indicators is critical for preventing accidental discharge and confirming that the device is ready for safe use.
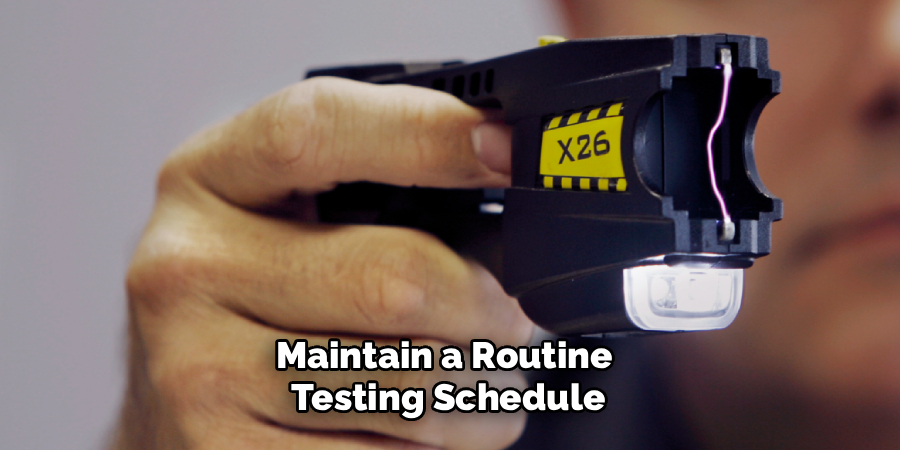
10. Routine Testing and Maintenance Logs
Finally, maintain a routine testing schedule and keep detailed records of each test. Document battery status, cartridge condition, output measurements, and any mechanical or electrical irregularities. Regularly scheduled testing ensures the Taser remains reliable and effective while reducing the likelihood of failure during critical moments. Maintenance logs also provide a history of device performance, helping identify patterns of wear or potential failures before they occur.
Maintenance and Upkeep
Proper maintenance and upkeep of the Taser are vital for ensuring its functionality and extending its lifespan. Begin by performing regular inspections to check for any visible damage, including cracks, corrosion, or loose components. Clean the device as recommended by the manufacturer, taking care to avoid exposing sensitive electronic parts to moisture. Replace cartridges and batteries according to their expiration or usage limits, and always use certified replacement parts to guarantee compatibility and performance. Store the Taser in a secure, dry location when not in use to prevent environmental wear and tear. Adhering to a consistent maintenance routine ensures that the device remains dependable when it is needed most.
Conclusion
Testing a Taser is a critical component of responsible ownership and effective self-defense. By reading manufacturer guidelines, establishing a safe testing environment, performing physical inspections, checking battery status, using training cartridges, and conducting live spark or probe deployment tests, you ensure the device functions reliably. Evaluating safety mechanisms, recording test results, and maintaining the Taser regularly further enhances performance and safety.
Following these ten methods ensures that a Taser remains fully operational, safe to handle, and ready to provide protection in emergencies. Now that you know how to test a taser. While it does take a few steps each time, hopefully, now you understand the process and why it’s worth taking the extra step to make sure your floor is properly cared for. So don’t wait any longer, take action today!
About
Safety Fic is a distinguished figure in the world of Diy design, with a decade of expertise creating innovative and sustainable Diy solutions. His professional focus lies in merging traditional craftsmanship with modern manufacturing techniques, fostering designs that are both practical and environmentally conscious. As the author of diy, Safety Fic delves into the art and science of Safety Fic-making, inspiring artisans and industry professionals alike.
Education RMIT University
(Melbourne, Australia) Associate Degree in Design (Safety Fic) Focus on sustainable design, industry-driven projects, and practical craftsmanship. Gained hands-on experience with traditional and digital manufacturing tools, such as CAD and CNC software.
Nottingham Trent University
(United Kingdom) Bachelor’s in diyfastly.com and Product Design (Honors) Specialized in product design with a focus on blending creativity with production techniques. Participated in industry projects, working with companies like John Lewis and Vitsoe to gain real-world insights.
Publications and Impact
In diy, Safety Fic his insights on indoor design processes, materials, and strategies for efficient production. His writing bridges the gap between artisan knowledge and modern industry needs, making it a must-read for both budding designers and seasoned professionals.