

Testing your backup camera can help you stay safe on the road and ensure that your rearview visibility is impeccable. Whether you have just had a backup camera installed or are thinking of doing so, it’s important to know how to test backup camera.
Testing your backup camera doesn’t involve any special equipment; all you need for the job are some everyday items and a few simple steps! Keep reading this blog post for more information about how to correctly perform a backup camera test.
Step-by-step Guidelines on How to Test Backup Camera
Step 1: Begin the test in a safe location
When testing your backup camera, it’s important to begin in a safe place. Choose an area that is free of traffic and other obstructions so you can confidently run the test without any external distractions. This will help ensure a successful test and avoid any potential accidents.
Step 2: Park your vehicle in reverse
Once you’ve found a suitable location for testing, park your car in reverse and turn on the ignition. Make sure the gear selector is firmly engaged in the “Reverse” position and that your foot is placed firmly on the brake pedal. Parking in reverse will allow you to easily see the images being displayed on your backup camera.
Step 3: Activate the backup camera
Now it’s time to activate your backup camera! Depending on the make and model of your vehicle, activating the camera should be relatively straightforward. Most vehicles have a button or toggle switch located near the gear shifter that turns on the backup camera when pressed. While other vehicles may have a separate key on the dashboard that activates the backup camera.
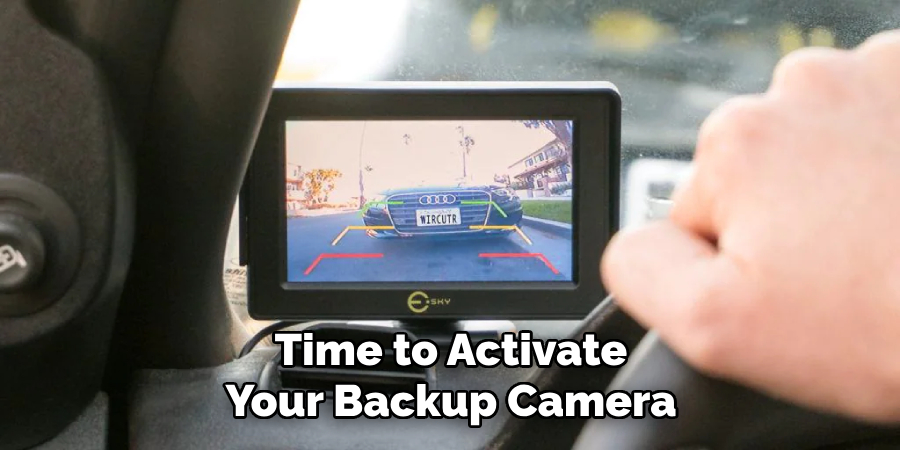
Step 4: Check the camera’s display
Once the backup camera is activated, take a moment to check that it is working correctly. The display should show a clear image of your surroundings and any objects behind you. If necessary, adjust the brightness or contrast settings for optimal results. Checking the camera’s display before and after each test can help you determine if any maintenance needs to be done.
Step 5: Move your vehicle slowly in reverse
Once you have confirmed that the camera is working correctly, move your car in reverse slowly and check the display. As you move, take note of any objects that appear behind you in the image. The information displayed should match what you can see outside with your own eyes.
Step 6: Review and analyze the results
Once you’ve completed this test, review the results to see if the camera is performing as expected. If everything looks good, then your backup camera is working correctly and you’re ready to hit the road!
Following these steps will help ensure that your backup camera is working properly and can provide you with the visibility and safety you need while driving. Don’t drive without taking the time to check your rearview camera every once in a while; it could save your life!
Additional Tips and Tricks to Test Backup Camera
1. When testing a backup camera, make sure that any objects that may be in the way are cleared away. This can include items on the dashboard or obstructing views out of the windows.
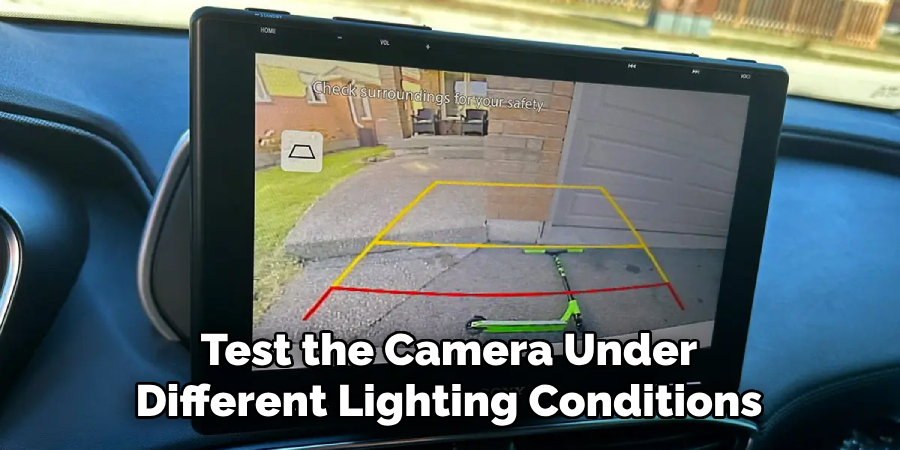
2. Take time to test the camera under different lighting conditions and at different times of day so you get an accurate idea of its performance. This will help identify any issues with light sensitivity or color accuracy.
3. Make sure to test the camera’s range. This will help determine how far the camera can see in the distance and may influence your decision on which backup camera is best for you.
4. If you’re testing a wired backup camera, make sure that all of its cables are properly attached and secured so that everything is working correctly before you take it for a test drive.
5. If you’re testing a wireless backup camera, make sure to check its Wi-Fi connection as well. This will help ensure that you can receive crystal clear images from your camera when backing up or parking.
6. Finally, be sure to keep an eye on the rearview mirror while testing the backup camera and use it as an additional tool to double-check your surroundings. This extra level of caution can help keep you and other drivers around you safe on the road.
7. Before making a purchase, try to compare different backup cameras side by side so that you can get a better understanding of their features and how they perform in real-life situations. Doing this will ensure that you choose the right camera for your needs.
8. When possible, try to find a backup camera that has night vision capabilities so you can be sure that visibility will never be an issue. This is especially important if you plan on doing a lot of driving at night or in low-light conditions.
9. If a backup camera comes with any additional features such as zooming or panning capabilities, make sure to test them out as well. This will give you a better idea of what the camera is capable of and how it can help with your driving experience.
10. Finally, make sure to check the warranty for any backup camera you are considering purchasing. This will help ensure that you have recourse in case something goes wrong with the camera and you need to get it replaced.
Following these tips and tricks will help you get the most out of your backup camera and make sure that you have the best possible experience when using it. With a little bit of research and testing, you can find the perfect backup camera for your needs. Good luck!
Things You Should Consider to Test Backup Camera
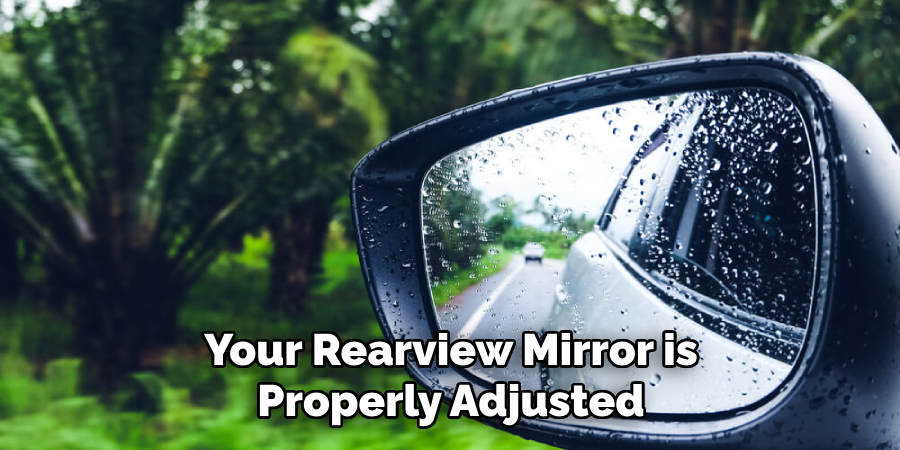
- Make sure your rearview mirror is properly adjusted. This will help you get a better view when using the backup camera.
- Check that the image on the screen of the backup camera is clear and sharp, with no distortion or blurriness.
- Ensure there are no obstructions blocking the lens of the camera; this could interfere with its ability to provide the best possible image.
- Test how the camera responds when reversing in different lighting conditions, such as bright sunlight or low light.
- If your backup camera is equipped with night vision, make sure it works correctly by testing it in a dark environment.
- Make sure that all of the lines on the screen of the backup camera are straight and properly aligned.
- Test the sensitivity of the camera; it should be able to detect objects at a distance of up to 10 feet away.
- Make sure the audio from your backup camera is working correctly, so you can hear any warnings that may be issued while reversing.
- Check if the image on your backup camera switches between color and black-and-white mode, depending on the lighting conditions.
Following these considerations will help ensure that your backup camera is functioning properly, so you can make more confident and safer reversing decisions.
Additionally, having a backup camera installed on your vehicle is also beneficial for parallel parking and other maneuvers in tight spaces. With a reliable system in place, even the most inexperienced drivers can feel more at ease maneuvering their vehicles.
Frequently Asked Questions
What Are Some Common Issues With Backup Cameras?
Common issues with backup cameras include a blurry image, static or interference on the screen, and an incorrect angle of view. It could also be that the camera just won’t turn on. These can all be symptoms of a faulty camera assembly or wiring harness. If possible, it is best to consult your owner’s manual for troubleshooting instructions.
How Does the Backup Camera Get Its Power?
Most backup cameras get their power from the reverse light circuit in a car, which should provide around 12 volts of power when the car is in reverse. If you have an aftermarket camera, it will likely need to be connected directly to the car’s battery.
How Do I Know if My Backup Camera Is Working?
The best way to test a backup camera is to turn on the car and put it in reverse. If the image appears on the monitor or screen immediately, then you know the camera is working correctly.
If there is no picture, check that all of your connections are secure and inspect any wiring that might be exposed. If the image is fuzzy or there is static, it could be a sign of interference from other electronics in the car or a faulty camera assembly.
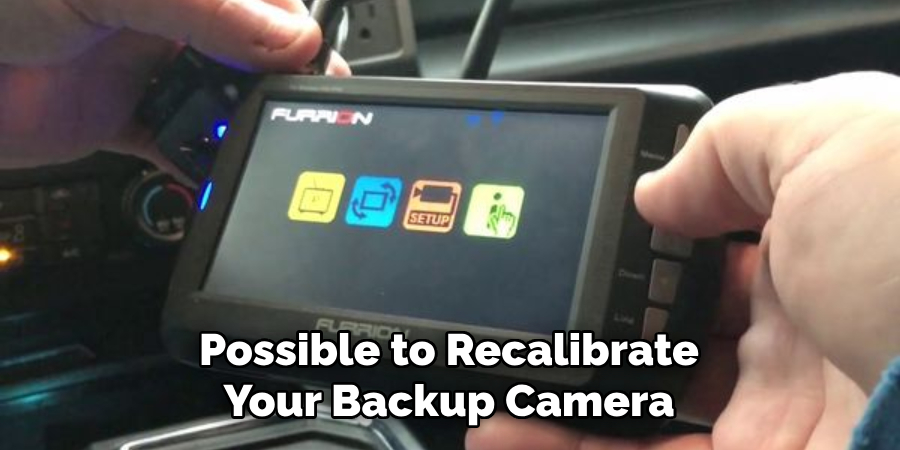
Is It Possible to Calibrate My Backup Camera?
Yes, it is possible to recalibrate your backup camera in some cases. This usually involves adjusting the angle or the focus of the camera lens using a screwdriver. Consult your owner’s manual for specific instructions on how to do this with your particular model of backup camera.
Conclusion
Now you know how to test backup camera and what to do if you have any common issues. The best way to know for sure that your backup camera is working correctly is to turn on the car put it in reverse, and then check the image on the monitor or screen. If necessary, it is possible to recalibrate the backup camera by adjusting the angle of view or focus of the lens using a screwdriver.
About
Safety Fic is a distinguished figure in the world of Diy design, with a decade of expertise creating innovative and sustainable Diy solutions. His professional focus lies in merging traditional craftsmanship with modern manufacturing techniques, fostering designs that are both practical and environmentally conscious. As the author of diy, Safety Fic delves into the art and science of Safety Fic-making, inspiring artisans and industry professionals alike.
Education RMIT University
(Melbourne, Australia) Associate Degree in Design (Safety Fic) Focus on sustainable design, industry-driven projects, and practical craftsmanship. Gained hands-on experience with traditional and digital manufacturing tools, such as CAD and CNC software.
Nottingham Trent University
(United Kingdom) Bachelor’s in diyfastly.com and Product Design (Honors) Specialized in product design with a focus on blending creativity with production techniques. Participated in industry projects, working with companies like John Lewis and Vitsoe to gain real-world insights.
Publications and Impact
In diy, Safety Fic his insights on indoor design processes, materials, and strategies for efficient production. His writing bridges the gap between artisan knowledge and modern industry needs, making it a must-read for both budding designers and seasoned professionals.