

Are you facing issues with your vehicle’s MAF (Mass Air Flow) sensor and suspect it might be faulty?
Testing an MAF (Mass Air Flow) sensor with a multimeter is essential for diagnosing potential issues with your vehicle’s engine performance. The MAF sensor is critical in monitoring the air entering the engine, ensuring the proper air-to-fuel ratio for optimal operation. A faulty MAF sensor can lead to problems like poor acceleration, reduced fuel efficiency, or even engine stalling. Using a multimeter, you can quickly test the sensor’s functionality and determine whether it needs cleaning, repair, or replacement.
This guide on how to test maf sensor with multimeter will walk you through the steps to accurately test your MAF sensor with a multimeter, helping you pinpoint problems and maintain your vehicle’s performance.
What Are the Benefits of Testing Your MAF Sensor with a Multimeter?
Testing your MAF sensor with a multimeter can benefit your vehicle’s performance and maintenance. Here are some of the key advantages:
- Identify Potential Issues: Regularly testing your MAF sensor can help you identify any potential issues before they develop into more significant problems. This can save you time, money, and frustration in the long run.
- Improve Fuel Efficiency: A properly functioning MAF sensor ensures that the correct amount of air enters the engine for combustion, resulting in improved fuel efficiency and cost savings.
- Maintain Engine Performance: The MAF sensor plays a crucial role in regulating the air flow to the engine, directly affecting its performance. Regular maintenance and cleaning of the MAF sensor can help maintain optimal engine performance.
- Reduce Harmful Emissions: An efficient MAF sensor ensures that your engine’s air-fuel mixture is balanced, leading to lower emission levels. This not only benefits the environment but also helps you pass emissions tests.
- Avoid Potential Engine Damage: A malfunctioning MAF sensor can lead to incorrect air-fuel ratios, causing damage to other engine components, such as spark plugs, oxygen sensors, and catalytic converters. Regularly monitoring and maintaining your MAF sensor can prevent costly repairs.
What Will You Need?
- MAF Sensor Cleaner: This specialized cleaning solution is designed specifically for cleaning MAF sensors. It is essential to use the correct cleaner, as other solvents may damage the delicate components of the sensor.
- Screwdriver or Socket Wrench: Depending on your vehicle, you may need either a screwdriver or a socket wrench to remove the MAF sensor from its housing.
- Cleaning Cloth: A soft, lint-free cloth is necessary for wiping down the sensor and removing any dirt or grime.
- Protective Gloves: Always wearing gloves when handling automotive fluids and chemicals to protect your skin is always a good idea.
- Safety Glasses: As with any automotive maintenance task, protecting your eyes from debris or cleaning solution splashes is crucial.
- Mass Air Flow Sensor Cleaner: This specialized cleaner is designed specifically for cleaning MAF sensors and should not be substituted with other household cleaners.
- Electrical Contact Cleaner (optional): If you have a heavily soiled sensor, you may also need to use an electrical contact cleaner to remove built-up grime and residue.
8 Easy Steps on How to Test MAF Sensor With Multimeter
Step 1. Turn Off the Engine and Disconnect the Battery:
Before beginning any work on your vehicle, ensure the engine is completely turned off. Working on a running car can be dangerous and may lead to accidents. Disc disconnecting the battery ensures your safety by preventing accidental short circuits.

This also protects the vehicle’s electrical components from potential damage. To disconnect the battery, first locate it under the hood, then use a wrench to loosen and remove the negative terminal cable. Ensuring the power is completely off is a crucial first step for safely testing your Mass Air Flow (MAF) sensor with a multimeter.
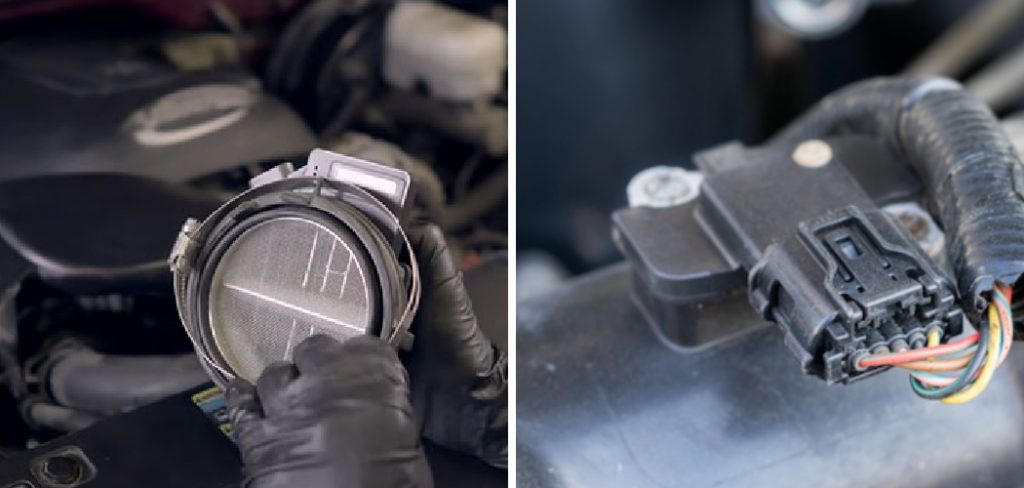
Step 2: Locate the MAF Sensor
Most vehicles typically use the Mass Air Flow (MAF) sensor between the air filter box and the intake manifold. It is a critical part of the vehicle’s engine management system as it measures the air entering the engine. This information allows the engine control unit (ECU) to calculate the proper fuel-air mixture for optimal performance.
You will usually follow the intake tubing from the air filter housing to locate the MAF sensor. The sensor is often housed in a module connected to the tubing and may have an electrical connector attached. It is essential to consult your vehicle’s manual if you’re having difficulty finding the MAF sensor, as the exact location can vary depending on the make and model of the car. Once identified, proceed with caution to ensure no damage is done to the sensor or nearby components.
Step 3: Disconnect the Battery
Before working on the MAF sensor, it is crucial to disconnect the negative terminal of your car’s battery. This step ensures safety by preventing accidental short circuits or electrical damage while handling the sensor. Use a wrench or socket to loosen the clamp on the negative cable and carefully remove it from the battery terminal. Ensure the cable is secured away from the terminal to prevent accidental reconnection.
Step 4: Locate the MAF Sensor
Once the battery is disconnected, identify the location of the MAF sensor in your vehicle. Typically, the MAF sensor is situated between the air filter box and the throttle body within the air intake system. Refer to your vehicle’s manual if you are having difficulty finding it. Look for a small, rectangular or cylindrical component with an electrical connector attached. Ensure you have clear access to the sensor before proceeding to the next step.
Step 5: Remove the MAF Sensor
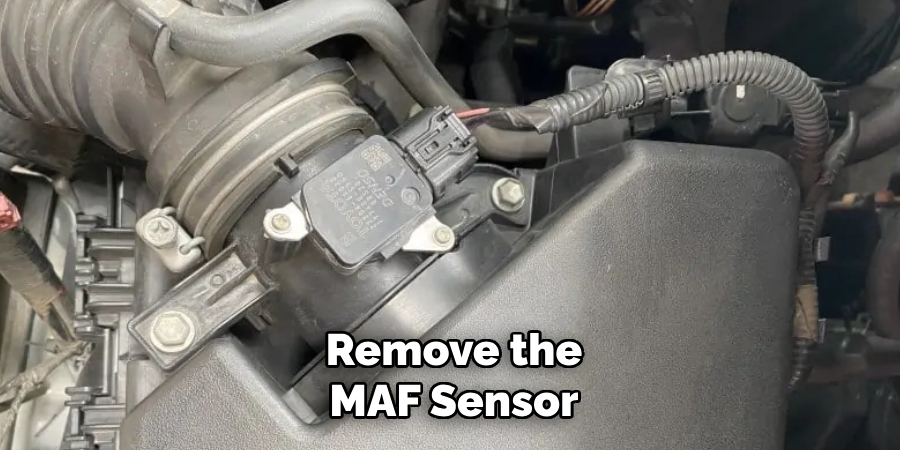
Carefully disconnect the electrical connector from the MAF sensor by pressing the release tab and pulling it away. Next, using the appropriate tools, loosen and remove any screws or clamps securing the sensor to the air intake system. Take out the MAF sensor, ensuring you do not damage the delicate sensor element. Place it on a clean, safe surface to prevent contamination or damage as you prepare for the cleaning or replacement process.
Step 6: Inspect the MAF Sensor
With the sensor removed, carefully inspect it for any visible signs of damage, such as cracks, broken elements, or excessive dirt and debris. If the sensor appears damaged, it may need to be replaced rather than cleaned. Check the electrical connectors for corrosion or buildup that could interfere with proper functioning. Ensuring the sensor is in good physical condition is vital before cleaning or installing a replacement.
Step 7: Clean the MAF Sensor
If the MAF sensor is not visibly damaged and only appears dirty, proceed with cleaning. Use a MAF sensor cleaner specifically designed for this purpose, as other cleaners may damage the delicate components. Hold the sensor by its edges and avoid touching the sensor elements directly. Spray the cleaner onto the sensor elements in short bursts, removing all debris. Allow the sensor to air dry thoroughly before reassembly. Do not use compressed air to speed up the drying process, as this could damage the sensor.
Step 8: Reinstall the MAF Sensor
Once the sensor is completely dry, carefully reinstall it into its original position. Align the sensor with the mounting points and secure it using the screws or clamps removed earlier. Ensure the sensor is seated properly and all connections are tight to prevent air leaks. Finally, reconnect the electrical connector, ensuring it clicks securely into place. Double-check everything before starting the vehicle to confirm proper installation.
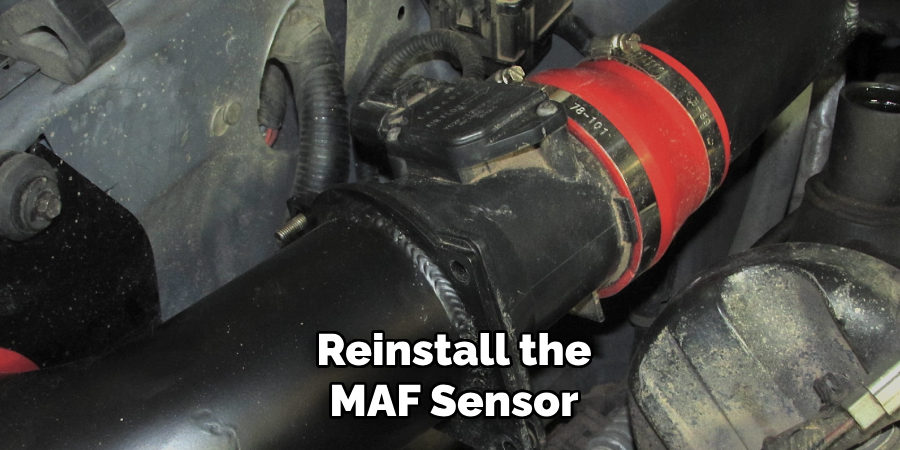
By following these steps, you can easily clean and reinstall your MAF sensor, improving engine performance and fuel efficiency.
5 Things You Should Avoid
- Using the Wrong Multimeter Settings: Always ensure that your multimeter is set to the correct mode and range for the specific test you are conducting. An incorrect setting can result in inaccurate readings or damage the multimeter or MAF sensor.
- Testing on a Hot MAF Sensor: Avoid testing the MAF sensor immediately after the engine runs, as it can still be too hot to handle. Testing the sensor while it is hot may also lead to false readings or potential damage to the sensor.
- Forgetting to Disconnect the Battery: Before testing the MAF sensor, make sure to disconnect the battery. Failing to do so can lead to short circuits or electrical damage while using the multimeter.
- Applying Excessive Force: When handling the MAF sensor or its connections, be gentle to avoid bending pins, damaging wires, or harming the sensor’s delicate components. Excessive force can lead to costly repairs or replacements.
- Skipping Reference Voltage Verification: Always check for the reference voltage before testing the signal voltage or resistance of the MAF sensor. Skipping this step can result in misdiagnosing the problem, as a faulty power supply could be mistaken for a defective sensor.
Conclusion
How to test MAF sensor with multimeter is a straightforward process when approached methodically.
You can accurately diagnose the sensor’s performance by following the outlined steps, including visual inspection, verifying reference voltage, testing signal voltage, and checking for proper resistance. Remember to handle the sensor carefully to avoid causing additional damage during testing. Proper diagnostics ensure that the sensor is functioning correctly and can prevent unnecessary replacements, saving time and money.
Always consult your vehicle’s service manual for specific guidelines and adhere to safe testing practices.