

A loose doorknob can be an annoying and potentially problematic issue in any household.
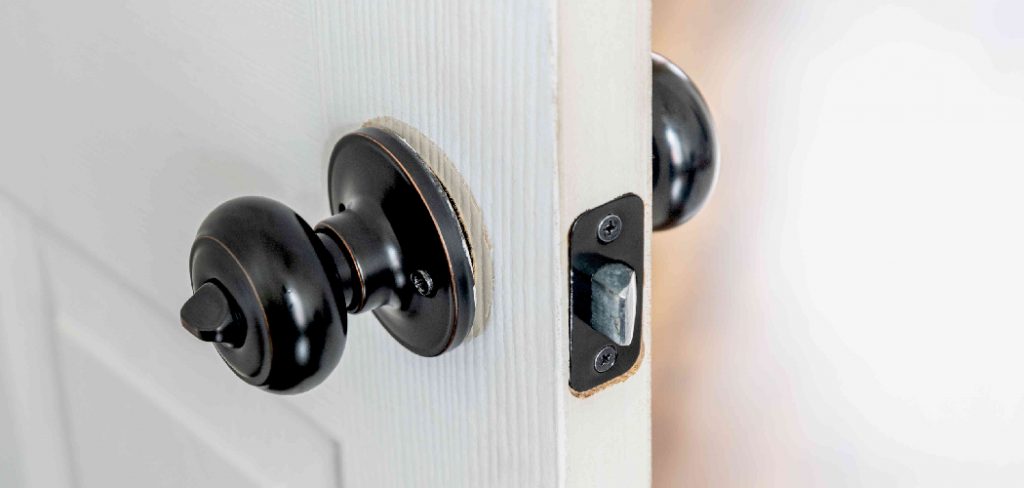
Not only does it affect the functionality of the door, but it can also pose a safety hazard if left unchecked. Fortunately, tightening a loose doorknob is a simple task that can be accomplished with minimal tools and a bit of know-how.
This guide on how to tighten a loose doorknob will walk you through the steps needed to secure your doorknob and ensure it functions smoothly.
Why Doorknobs Become Loose?
Before we jump into the steps to tighten a loose doorknob, it’s important to understand why this issue may occur in the first place.
Over time, as doors are opened and closed repeatedly, the screws holding the doorknob in place can become loose. This is especially common with frequently used doors or if the door is slammed shut often.
In addition, changes in weather and temperature can cause wood to expand or contract, which can also loosen the screws over time.
Tools You Will Need
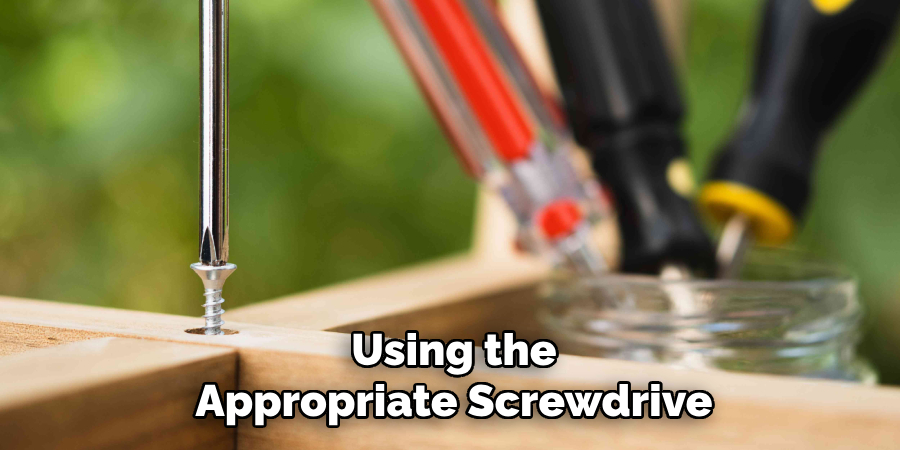
Screwdriver (Phillips or Flathead, Depending on Your Doorknob):
The type of screwdriver needed will depend on the type of doorknob you have. Most doorknobs use either a Phillips or flathead screw, so make sure to have both types on hand just in case.
Pliers:
Pliers may be necessary if the screws are too tight and cannot be loosened by hand. They can also be used to grip and hold small screws that may fall out during the tightening process.
7 Step-by-step Guidelines on How to Tighten a Loose Doorknob
Step 1: Remove the Doorknob
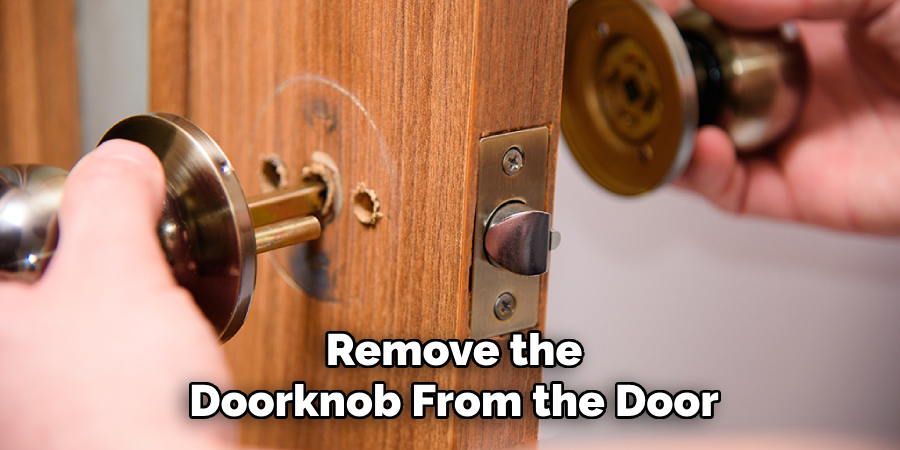
To begin, you will need to remove the doorknob from the door. Start by locating the screws that hold the two halves of the doorknob together. These screws are typically found on the inside portion of the doorknob. Using the appropriate screwdriver, carefully unscrew each one.
Keep track of the screws as you remove them to ensure they do not get lost. Once the screws are out, gently pull the doorknob apart, separating the interior and exterior halves.
This will give you access to the internal mechanism and mounting plate, making it easier to tighten any loose components.
Step 2: Tighten the Screws
Now that you have removed the doorknob and have access to the internal mechanism locate the screws that attach the mounting plate to the door. These screws are responsible for securing the doorknob in place.
Using your screwdriver, check each screw to see if it has become loose. Tighten any loose screws by turning them clockwise until they are snug but not overly tight.
Over-tightening can strip the screw holes or damage the mounting plate, so it’s important to apply a moderate amount of pressure. Once all the screws are tightened, recheck to ensure that the mounting plate is securely fastened to the door. This will help stabilize the doorknob and prevent further loosening.
Step 3: Check the Set Screw
With the mounting plate securely tightened, you’ll next want to inspect the set screw on the doorknob. The set screw is a small screw that holds the doorknob onto the spindle (the small rod connecting the two halves).
Rotate the doorknob until you locate the set screw, which is often positioned on the side of the doorknob or under a decorative cap. Once located, use the appropriate screwdriver to check if the set screw is loose. If it is, tighten it by turning it clockwise.
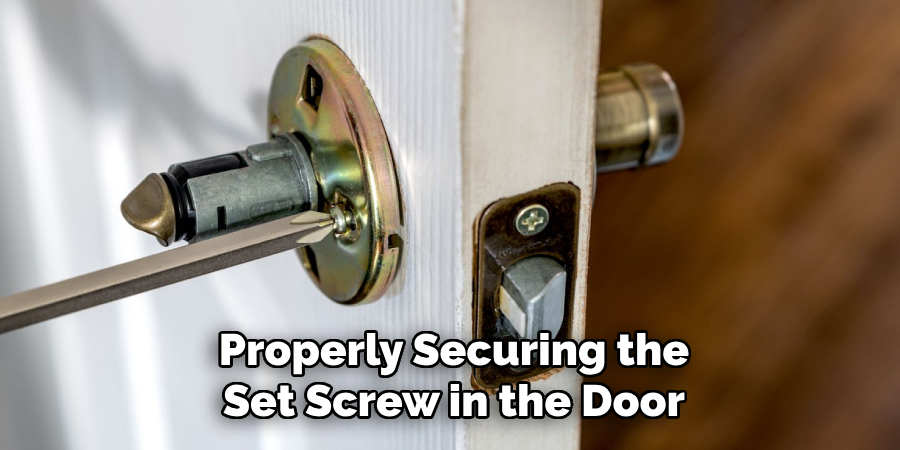
Be cautious not to over-tighten, as this could strip the screw or damage the spindle. Properly securing the set screw is crucial as it ensures the doorknob does not slip or come off when turned.
After tightening, test the doorknob by turning it several times to confirm it remains firmly in place and functions smoothly.
Step 4: Inspect the Spindle
After confirming that the set screw is properly tightened, the next step is to inspect the spindle. The spindle is the rod that connects the two halves of the doorknob and operates the latch when the doorknob is turned.
Over time, the spindle can become worn or misaligned, affecting the functionality of the doorknob. Carefully examine the spindle for any signs of wear or damage. Look for any bends, cracks, or excessive wear on the ends that connect to the doorknob halves.
If the spindle appears damaged, it may need to be replaced. To ensure the spindle is correctly aligned, insert it back into the latch mechanism and turn it to check for smooth operation.
If the spindle is not engaging properly with the latch, adjust its position until it fits securely and operates the latch smoothly.
This inspection and adjustment are critical for the overall performance of the doorknob, ensuring it turns without resistance and securely operates the door latch. Once you are satisfied that the spindle is in good condition and properly aligned, you can proceed to reassemble the doorknob.
Step 5: Reassemble the Doorknob
With all components in good condition and properly tightened, you can now reassemble the doorknob. Start by aligning the two halves of the doorknob and gently pushing them together until they fit snugly.
Double-check that all screws, including the set screw, are securely tightened to avoid any future loosening. Once satisfied, test the doorknob by turning it several times to confirm it functions smoothly and without resistance.
Step 6: Tighten Loose Door Hinges
In addition to a loose doorknob, loose door hinges can contribute to a door that does not operate smoothly. To address this, start by inspecting each hinge to see if the screws have become loose.
Typically, door hinges are attached with screws on both the door and the door frame. Using the appropriate screwdriver, check each screw and tighten any that appear loose by turning them clockwise.
If you encounter screws that are stripped or no longer grip tightly, you may need to replace them with new screws of the same size.
Ensuring that the hinges are securely fastened will help maintain the overall alignment and function of the door, providing additional stability to the doorknob. After tightening the hinges, open and close the door several times to verify that it moves smoothly and that the doorknob remains stable.
Step 7: Use a Wood Filler for Loose Screw Holes
If you have tightened all the screws, but some still feel loose, they may be in stripped screw holes. A common cause of stripped screw holes is repetitive use of the doorknob and door over time. To fix this problem, you will need to fill in the stripped screw holes with a wood filler or putty.
Before applying any filler, ensure that the area around the hole is clean and dry. Following the manufacturer’s instructions on how to tighten a loose doorknob, apply the filler to each hole and wait for it to dry completely before proceeding.
Once dry, use sandpaper to smooth the surface and remove any excess filler. This will provide a solid, stable base for the screws to grip onto when reinserted.
Additional Tips
Regular Maintenance:
Regularly check all door components, including doorknobs and hinges, for any signs of wear or looseness. This proactive approach can help prevent issues before they become significant problems.

Use Quality Tools:
Using the appropriate, high-quality tools can make your repairs more effective and reduce the risk of causing damage. Ensure your screwdrivers and other tools are in good condition.
Lubricate Moving Parts:
Occasionally, a lubricant, such as graphite powder or a silicone-based spray, is applied to the moving parts of the doorknob mechanism. This can help maintain smooth operation and reduce wear.
Address Other Issues:
If you notice any additional issues, such as a faulty latch or damaged door frame, address them promptly to maintain the overall function and security of your door.
Call a Professional:
If you are unsure about how to tighten a loose doorknob or if the problem persists after attempting these steps, it may be best to call a professional for assistance. They can provide expert advice and ensure the issue is properly resolved.
Overall, taking care of minor repairs and maintenance can help ensure that your doorknobs remain functional and secure for years to come.
By following these steps and regularly checking for any issues, you can maintain the safety and convenience of your door. No matter how small the repair may seem, proper attention and care can go a long way in preserving the longevity of your doorknob.
Frequently Asked Questions
Q: Why Does My Doorknob Keep Loosening?
A: There are a few reasons why a doorknob may become loose over time. These include repetitive use, temperature fluctuations, and structural changes in the door or frame.
Additionally, if the mounting plate or screws were not properly installed initially, this could also contribute to a loose doorknob.
Q: Can I Use Caulk Instead of Wood Filler for Stripped Screw Holes?
A: While caulk may seem like a quick fix, it is not recommended for filling in stripped screw holes. Wood filler or putty, specifically designed for this purpose, will provide a more stable and long-lasting solution.
Q: How Often Should I Check My Doorknobs for Loose Screws?
A: It’s a good idea to periodically check your doorknobs for any loose screws and tighten them as needed. This can help prevent further loosening and prolong the lifespan of your doorknob.

Additionally, if you notice any changes in the functionality or stability of your doorknob, it’s best to check for loose screws and make any necessary adjustments.
Q: Can I Reuse Stripped Screws in a Wood Filler?
A: No, it is not recommended to reuse stripped screws even after filling the holes with wood filler. Over time, these screws may become loose again as they are not securely gripping onto a solid surface. It’s always best to replace stripped screws with new ones when possible.
Conclusion
By following these simple steps on how to tighten a loose doorknob, you can easily fix a loose doorknob without having to call a professional.
Remember to check all components and ensure the screws are properly tightened to maintain the stability and functionality of your doorknob.
Regular maintenance can help prevent future loosening and extend the lifespan of your doorknob. So, make sure to check and tighten any loose components periodically to keep your doorknob in good working condition. Happy fixing!
About
Safety Fic is a distinguished figure in the world of Diy design, with a decade of expertise creating innovative and sustainable Diy solutions. His professional focus lies in merging traditional craftsmanship with modern manufacturing techniques, fostering designs that are both practical and environmentally conscious. As the author of diy, Safety Fic delves into the art and science of Safety Fic-making, inspiring artisans and industry professionals alike.
Education RMIT University
(Melbourne, Australia) Associate Degree in Design (Safety Fic) Focus on sustainable design, industry-driven projects, and practical craftsmanship. Gained hands-on experience with traditional and digital manufacturing tools, such as CAD and CNC software.
Nottingham Trent University
(United Kingdom) Bachelor’s in diyfastly.com and Product Design (Honors) Specialized in product design with a focus on blending creativity with production techniques. Participated in industry projects, working with companies like John Lewis and Vitsoe to gain real-world insights.
Publications and Impact
In diy, Safety Fic his insights on indoor design processes, materials, and strategies for efficient production. His writing bridges the gap between artisan knowledge and modern industry needs, making it a must-read for both budding designers and seasoned professionals.