

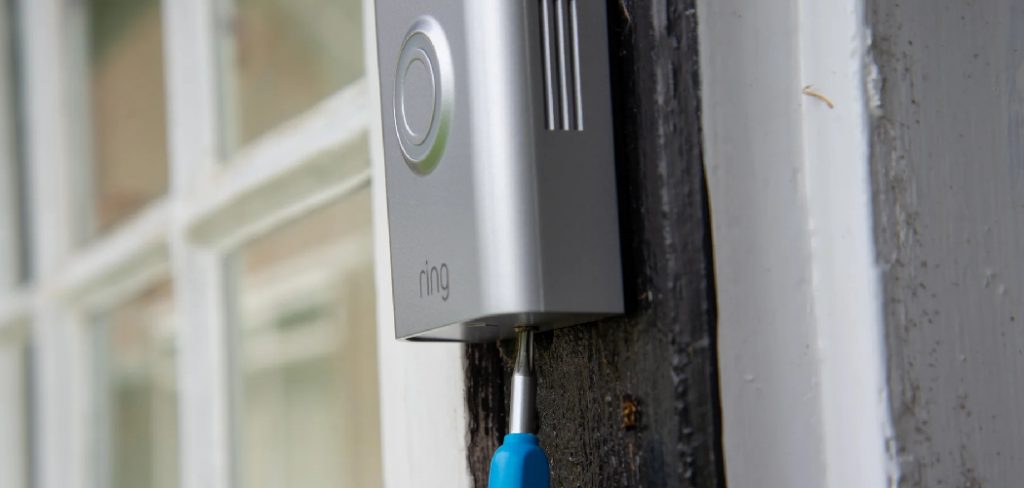
The Ring doorbell has become an essential fixture in the realm of home security, offering homeowners peace of mind through live video feeds, motion detection alerts, and two-way audio communication with visitors. However, as circumstances change—such as replacing your current device with the latest model, moving to a new home, or selling your property—the need arises to master how to uninstall Ring doorbell properly.
This guide will walk you through the crucial steps of safely and efficiently removing your Ring doorbell. Whether you’re upgrading to newer technology, relocating to a different residence, or preparing your home for new occupants, understanding the correct uninstallation process is vital.
Not only does it ensure the safety of your home’s electrical systems and the integrity of your device, but it also prepares your Ring doorbell for a smooth transition, whether that be into the hands of a new owner or back to the manufacturer for recycling.
Understanding Your Ring Doorbell Model
When planning to uninstall your Ring doorbell, knowing the specific model you’re dealing with is essential. Ring offers various models, including wired versions like the Ring Pro and Ring Elite, as well as battery-powered options such as the Ring Video Doorbell (1st, 2nd, and 3rd generations) and the newer models.
Each model may have unique removal instructions, particularly concerning the disconnection of power sources or the handling of mounting brackets.
To ensure a safe and effective uninstallation process, refer to the user manual or the Ring support website to confirm the steps specific to your device’s model. Familiarizing yourself with these details can prevent damage to both the device and your home.
Safety Precautions Before You Begin
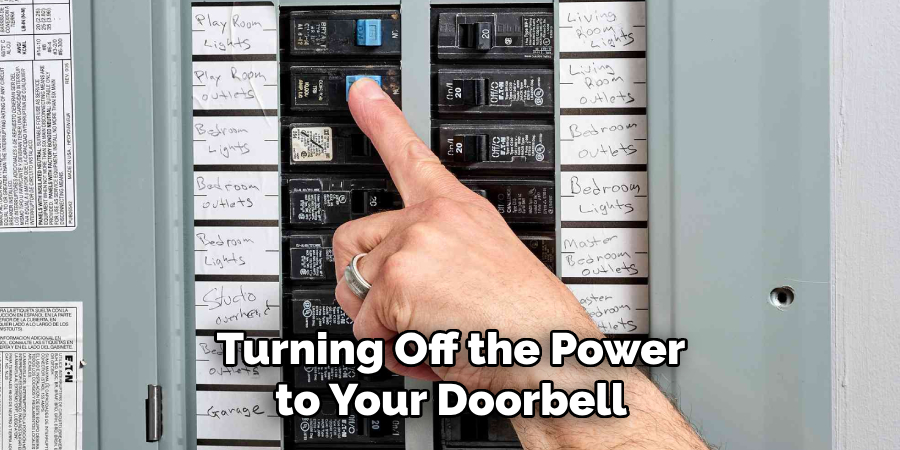
Before you commence the uninstallation of your wired Ring doorbell, it is paramount to prioritize your safety and that of your home’s electrical system. Begin by turning off the power to your doorbell at the breaker box. This crucial step prevents the risk of electrical shock and ensures a safe environment for you to work in.
It’s equally important to don proper safety gear. Protective gloves safeguard your hands from sharp edges and potential wire pricks, while safety glasses shield your eyes from dust and debris, which is especially crucial when dealing with electrical components or if you need to drill or adjust fixtures.
Lastly, ensure you have a stable work surface. Use a sturdy ladder or step stool if your doorbell is mounted at a height. This not only provides you with comfortable access to the doorbell but also prevents accidental falls or strain. Adhering to these safety precautions lays a solid foundation for a smooth and secure uninstallation process.
How to Uninstall Ring Doorbell: Uninstalling the Ring Doorbell (Wired Models)
A. Shutting Off Power
Start by locating your home’s breaker box, which typically houses all electrical circuit breakers. Identify the specific breaker that powers your doorbell circuit. It may be labeled ‘doorbell,’ or you may need to test each breaker. Once identified, switch it off to ensure a safe working environment as you proceed with the uninstallation.
B. Disconnecting the Wires
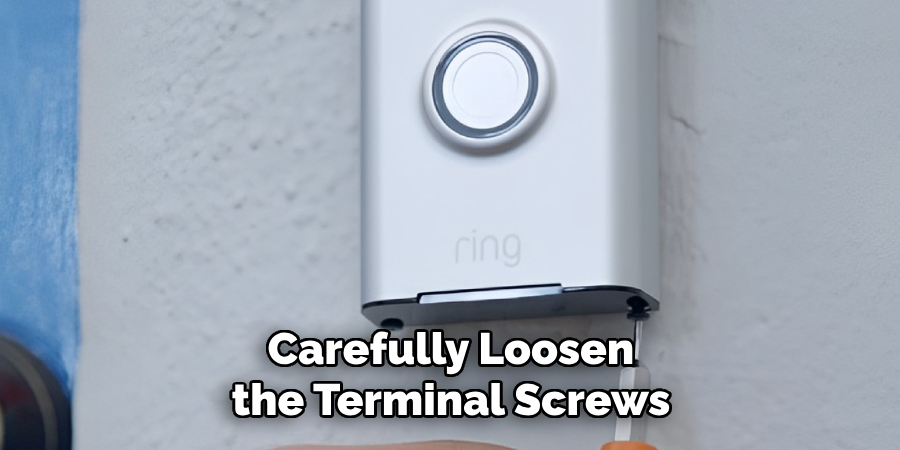
With the power off, use a screwdriver to carefully loosen the terminal screws that secure the wiring on the doorbell mount. Pay attention to the color and placement of each wire; it’s advisable to take a photo or make a note of this for future reference. Gently remove each wire from its terminal, ensuring it does not tug or damage the wire in the process.
Labeling each wire based on its connection point can be extremely helpful if you plan on reinstalling the doorbell or a new one in the same location. After disconnecting, secure the wires with electrical tape to prevent them from falling back into the wall cavity or touching each other if you’re planning immediate reinstallation.
C. Removing the Mounting Bracket
Subsequently, use the appropriate screwdriver to remove the screws that hold the doorbell’s mounting bracket to the wall. These screws can be tight, so applying adequate pressure is key. Once all screws are removed, gently pull the mounting bracket straight out from the wall.
Be cautious during this step to avoid damaging the wall around the bracket. If the bracket seems stuck, check for any additional screws you might have missed or gently wiggle the bracket to loosen it before attempting another pull.
D. Patching and Painting (optional)
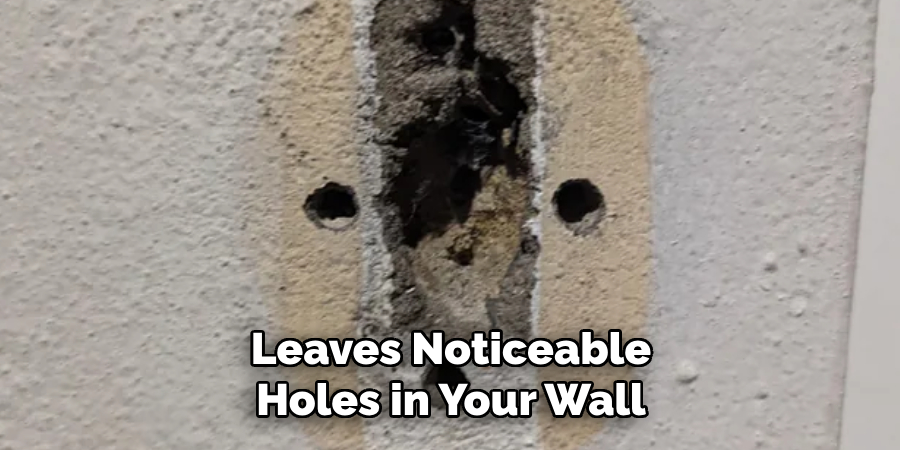
If removing the doorbell leaves noticeable holes in your wall, you can opt to patch them using a simple patching compound available at most hardware stores. Apply it smoothly over the holes, and once dry, lightly sand the area until it’s flush with the wall surface. A matching paint can then be applied for a seamless and clean finish, effectively concealing any signs of the previous installation.
How to Uninstall Ring Doorbell: Uninstalling the Ring Doorbell (Battery-Powered Models)
A. Removing the Faceplate
To begin the uninstallation of a battery-powered Ring doorbell, start by locating the security screw at the bottom of the faceplate. Using a screwdriver, carefully unscrew to remove this security screw.
Once removed, gently press down on the bottom of the faceplate and push it towards yourself. This action should release the faceplate from the main body of the doorbell, providing access to the battery compartment and the mounting bracket beneath.
B. Unmounting the Doorbell Bracket

Next, use the appropriate screwdriver to remove the screws that secure the doorbell bracket to the wall. These screws may be snug, so apply sufficient pressure to loosen them without stripping the heads. With the screws removed, gently pull the doorbell and its bracket straight out from the wall. Exercise caution to avoid any wall or doorbell unit damage during removal.
C. Removing the Battery (optional)
If your model includes a removable battery and you’re planning on storing or disposing of the device, it’s advisable to take out the battery. Open the battery compartment, which became accessible after removing the faceplate, and gently remove the battery from its housing. Handle the battery with care and follow the manufacturer’s guidelines for storage or disposal.
D. Patching and Painting (optional)
The process of removing your doorbell might leave small holes in your wall from the mounting screws. You can opt to patch these holes using a simple wall patching compound found at local hardware stores.
Fill the holes with the compound, allow it to dry, and then sand it down to make the surface smooth. Finally, cover the area with matching paint for a seamless look, erasing any visual evidence of the previous doorbell installation.
Resetting Your Ring Doorbell
A. Importance of Resetting Before Disposal or Gifting
Resetting your Ring Doorbell is a critical step before you dispose of it or pass it on to a new owner. This process ensures that all your personal data, including Wi-Fi settings and access privileges, are completely erased from the device.
It prevents the next user from accessing your video history or receiving notifications tied to your account. Essentially, a factory reset safeguards your privacy and security while also providing the next owner with a clean slate, enabling them to set up the doorbell as if it were new, with their own settings and preferences.
B. Resetting Process for Wired and Battery Models
The process to reset your Ring Doorbell slightly varies between wired and battery-powered models but generally involves locating a small, recessed reset button on the device. For most models, this button can be found on the back of the device or beneath the faceplate for battery-operated units.
To initiate the reset, press and hold this button for a specific duration—usually around 15 seconds. An LED light on the front will often flash several times to indicate the reset is in progress. Once the light pattern stabilizes, the Ring Doorbell has been reset to factory settings, ready for a new setup by the next owner.
Rehoming or Recycling Your Ring Doorbell
A. Rehoming Options
Gifting or selling your Ring Doorbell to someone else can extend its service life and reduce electronic waste. If you choose to rehome your device, informing the new owner about the specific model and its setup requirements is crucial. Providing them with the original installation guide, if available, along with details on any associated warranty, can ensure a smooth transition.
Additionally, performing a factory reset, as detailed in section VI, is important to protect your privacy and allow the new owner to start fresh, setting up the device with their personal information and preferences.
B. Recycling Considerations
Engaging in responsible disposal practices is essential for those whose Ring Doorbells have reached the end of their usable life. Ring offers a recycling program for its devices, ensuring that the components are handled in an environmentally safe manner. Information about this program can be found on Ring’s official website or by contacting their customer service. Alternatively, many communities provide electronics recycling services.
Checking with your local waste management facilities for electronics recycling options can offer a convenient and ecological way to dispose of your old doorbell, helping to minimize electronic waste and its impact on the environment.
Additional Considerations for Different Ring Doorbell Models
A. Ring Doorbell Pro
The Ring Doorbell Pro model, being hardwired, requires careful handling, especially in terms of power management during removal. Before attempting to uninstall, it’s imperative to turn off the circuit breaker that supplies power to the doorbell to ensure safety.
Unique to the Ring Doorbell Pro is additional security screws located at the bottom of the unit, which need to be removed with a specialized screwdriver provided by Ring. This step is crucial for detaching the device from its mounting bracket, exemplifying a safety feature designed to prevent theft.
B. Ring Doorbell Elite
The Ring Doorbell Elite stands out due to its flush-mount design and reliance on Power over Ethernet (PoE) for both power and internet connectivity. When removing the Elite model, a noteworthy step is the disconnection of the ethernet cable.
This process involves gently detaching the cable from the back of the unit once the device is unscrewed and slightly pulled away from the wall. Given its sophisticated wiring, users are advised to label or take a photo of the cable setup before removal to aid in reinstallation or troubleshooting in the future.
C. Ring Video Doorbell (battery-powered, older models)
Older battery-powered models of the Ring Video Doorbell might have variations in the mounting mechanism and the accessibility of the battery compartment. These models often feature a simpler design, where the faceplate does not secure with a security screw but rather snaps into place.

To remove the device, users need to firmly press and slide up the faceplate to access the battery for removal. It’s important to remember that while the overall uninstallation process is less involved compared to newer models, ensuring that the device is free from power by removing the battery is a step that should not be overlooked.
Troubleshooting Common Issues During Uninstallation
A. Difficulty Removing Screws
When encountering resistance while trying to remove the screws from a Ring Doorbell, the problem often lies in not using the correct screwdriver size. Ensure you’re equipped with a screwdriver that perfectly fits the screw’s head to prevent stripping. If the screw still doesn’t budge, applying a few drops of penetrating oil around the screw’s base can help loosen it.
Allow the oil a few minutes to seep into the threads before attempting removal again. This method can greatly ease the unscrewing process, making it smoother and preventing damage to the screws or the screwdriver.
B. Wires Won’t Disconnect from Terminals
Removing wires from the terminals can sometimes prove challenging, especially if the screws securing them are tight or if there’s resistance from the wires themselves. To safely remove the wires, first, ensure the power is off.
Use needle-nose pliers or a similar tool to gently wiggle the wire side to side while simultaneously loosening the terminal screw. This method reduces the risk of damaging the wire or the terminal. It’s crucial to avoid pulling directly on the wires, as this can cause them to break or damage the terminal.
C. Damaged Wall After Removing Mounting Bracket
Minor holes or damages to the wall may become visible upon removing the Ring Doorbell’s mounting bracket. A simple fix for this issue is utilizing a patching compound or spackle, available at most hardware stores. Fill the holes with the compound, smooth it out with a putty knife, and allow it to dry according to the product’s instructions.
Once dry, lightly sand over the area to ensure a smooth, level surface. Finish by applying paint matching your wall to restore the area to its original look, effectively erasing any signs of the previous installation.
Frequently Asked Questions
Q: Can I Reinstall My Ring Doorbell at A New Location After Uninstalling It?
A: Yes, you can reinstall your Ring Doorbell at a new location. Make sure to perform a factory reset before setting it up at the new location to ensure it functions correctly with your new Wi-Fi network and settings.
Q: What Should I Do if My Ring Doorbell Does Not Power on After Reinstallation?
A: Check to ensure all connections are secure and that the device is receiving power. For hardwired models, verify that the circuit breaker is turned on. For battery-powered models, ensure the battery is fully charged and properly installed. If the issue persists, contact Ring Support for further assistance.
Q: Is It Necessary to Notify Ring if I Move My Doorbell to A New Address?
A: While it’s not strictly necessary, it is recommended to update your address in the Ring app. This ensures that your doorbell’s location-based features function correctly and that emergency services have the correct address in case of an alarm (for users subscribed to Ring Protect Plus).
Q: Can I Recycle My Old Ring Doorbell if It’s No Longer Functioning?
A: Yes, Ring encourages responsible recycling of its devices. You can participate in Ring’s recycling program or inquire about electronics recycling options at your local waste management facilities.
Q: What Tools Do I Need to Uninstall a Ring Doorbell?
A: The primary tool needed is the screwdriver provided by Ring. Depending on your model, you might also need needle-nose pliers for wire removal, penetrating oil for tight screws, and potentially a patching compound for any minor wall repairs post-uninstallation.
Q: How Do I Remove a Ring Doorbell That’s Been Painted Over?
A: Carefully use a utility knife to score around the edges of the device where paint may be sealing it to the wall. Be cautious not to cut into the wiring or damage the wall further. After scoring, you should be able to proceed with the standard removal process.
Conclusion
In this guide, we’ve explored the essential steps on how to uninstall Ring doorbell devices, whether they’re wired models like the Ring Doorbell Pro and Elite or battery-powered versions, including older Ring Video Doorbell models. Central to each uninstallation process is the importance of safety precautions, such as turning off power at the circuit breaker for wired models and removing the battery for powered ones.
For Ring Doorbell Pro and Elite, handling specialized security screws and managing ethernet connections are specific steps that require attention. Meanwhile, battery-powered models demand a simpler approach, focusing on the removal of the faceplate and battery.
Additionally, the necessity of performing a factory reset on the device cannot be overstressed. This step ensures personal data protection before rehoming or disposing of your Ring doorbell. For those considering disposal, opting for Ring’s recycling program or local electronic waste facilities underscores the significance of responsible recycling practices in minimizing environmental impact.
Ultimately, the process of how to uninstall a Ring doorbell illustrates the blend of technical steps and safety measures involved, highlighting the dual goals of securing personal information and promoting environmental sustainability through responsible rehoming or recycling.
About
Safety Fic is a distinguished figure in the world of Diy design, with a decade of expertise creating innovative and sustainable Diy solutions. His professional focus lies in merging traditional craftsmanship with modern manufacturing techniques, fostering designs that are both practical and environmentally conscious. As the author of diy, Safety Fic delves into the art and science of Safety Fic-making, inspiring artisans and industry professionals alike.
Education RMIT University
(Melbourne, Australia) Associate Degree in Design (Safety Fic) Focus on sustainable design, industry-driven projects, and practical craftsmanship. Gained hands-on experience with traditional and digital manufacturing tools, such as CAD and CNC software.
Nottingham Trent University
(United Kingdom) Bachelor’s in diyfastly.com and Product Design (Honors) Specialized in product design with a focus on blending creativity with production techniques. Participated in industry projects, working with companies like John Lewis and Vitsoe to gain real-world insights.
Publications and Impact
In diy, Safety Fic his insights on indoor design processes, materials, and strategies for efficient production. His writing bridges the gap between artisan knowledge and modern industry needs, making it a must-read for both budding designers and seasoned professionals.