

Light sensors are versatile devices used to detect and measure the intensity of light in various environments. They play an essential role in a wide range of applications, from automatically adjusting the brightness of screens to enabling energy-efficient lighting systems. Understanding how to use a light sensor can help you integrate this technology into your projects effectively, whether for practical purposes or innovative designs. This guide will provide a clear and straightforward overview of the process, ensuring you can make the most of your light sensor.

How Light Sensors Work
Light sensors operate by detecting and interpreting the intensity of light in their surrounding environment. Most light sensors rely on a photodetector, a component that converts light energy into an electrical signal. When light hits the photodetector, it generates a current proportional to the intensity of the light. This signal is then processed by the sensor’s internal circuitry to provide a readable output.
Some sensors use specific materials, like photodiodes or photoresistors, that exhibit changes in conductivity based on light exposure. These variations in electrical response allow the sensor to measure changes in light levels accurately. Advanced light sensors may include additional features, such as filtering specific wavelengths or adapting to dynamic lighting conditions, to optimize their performance for specific applications.
Types of Light Sensors You Can Use
There are several types of light sensors available, each designed for specific applications and offering unique advantages. Below are some common types:
Photodiodes
Photodiodes are semiconductor devices that convert light into electrical current. They are highly sensitive and suitable for applications requiring precise light measurements, such as in medical devices, optical communication, and scientific instrumentation.
Photoresistors (LDRs)
Photoresistors, also known as Light Dependent Resistors (LDRs), change their electrical resistance based on the intensity of light. They are often used in simple, cost-effective applications like automatic lighting systems and night lights.
Phototransistors
Phototransistors operate similarly to photodiodes but offer higher sensitivity due to their built-in amplification. These sensors are commonly used in devices that require fast response times, such as remote controls or optical switches.
Ambient Light Sensors
Ambient light sensors are specialized sensors designed to measure the intensity of ambient or surrounding light. They are frequently integrated into smartphones, laptops, and other devices to adjust screen brightness automatically.
Infrared Sensors
Infrared sensors detect light wavelengths in the infrared spectrum, which is invisible to the human eye. These are often utilized in security systems, proximity sensors, and remote sensing applications.
Color Sensors
Color sensors go beyond measuring light intensity and can detect specific wavelengths to determine the color of the light source. They are popular in industrial automation, quality control, and consumer electronics.
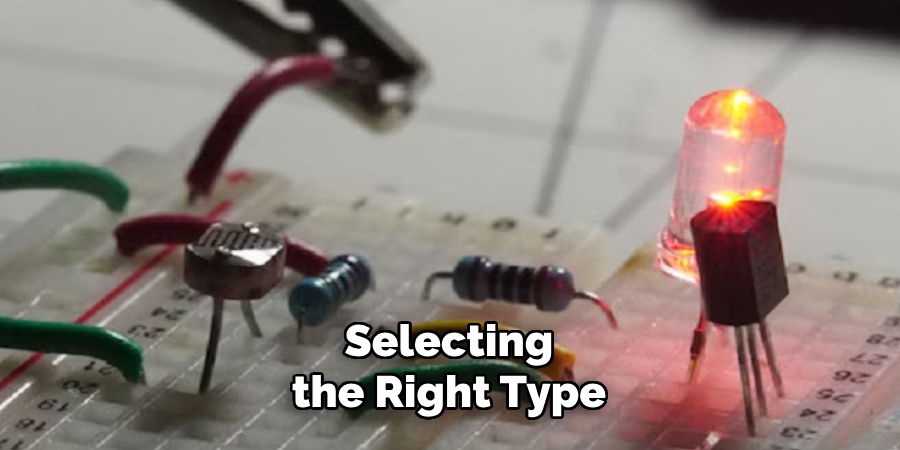
Each of these light sensors has distinct features and advantages, making them versatile for a wide range of uses in both commercial and industrial settings. Selecting the right type depends on the specific requirements of your application.
10 Methods How to Use a Light Sensor
1. Understand the Purpose and Types of Light Sensors
Before you can effectively use a light sensor, it’s essential to grasp what it does and the various types available. Light sensors detect the intensity or presence of light and convert this information into an electrical signal. Common types include photoresistors (LDRs), photodiodes, phototransistors, and digital light sensors like the TSL2561. LDRs change resistance based on ambient light, making them ideal for simple light/dark detection. More advanced sensors offer precise lux readings. Knowing what kind of sensor you’re working with helps you choose the right application and control logic for your project or environment.
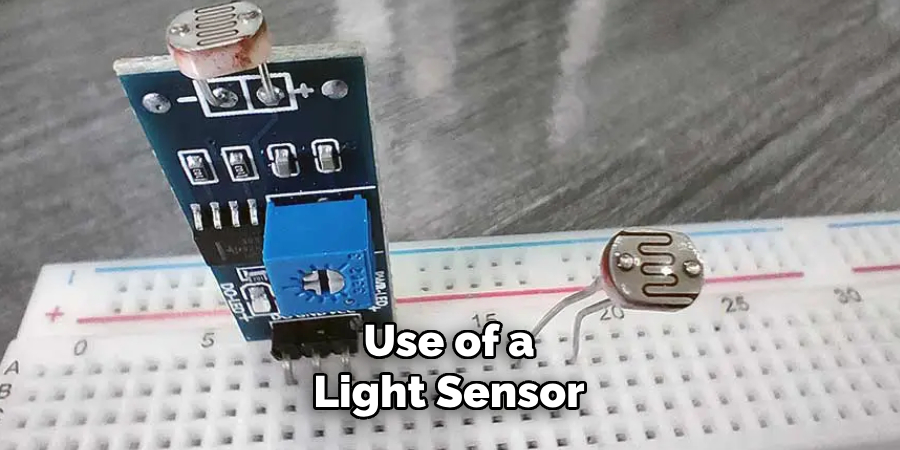
2. Set Up the Sensor on a Breadboard or PCB
Once you’ve selected your sensor, begin by setting it up on a breadboard or printed circuit board. Insert the sensor so it has a stable and clean connection with the power and signal lines. For an LDR, you typically connect one terminal to the voltage supply and the other to a resistor that then goes to ground. The voltage between the LDR and resistor is used as the output signal. For digital sensors, connect the appropriate power (3.3V or 5V), ground, and data pins (usually I2C or analog). A stable setup ensures accurate readings and prevents hardware faults.
3. Calibrate the Sensor for Your Environment
After the hardware setup, calibration is key. Every environment has different light conditions—indoors with artificial light, outdoors with variable sunlight, or even dimly lit rooms. Measure the light levels under various conditions and observe how the sensor responds. For LDRs, monitor the changing voltage across the resistor. For digital sensors, read lux values using a microcontroller like Arduino or Raspberry Pi. Create a chart of readings and corresponding light levels to determine what thresholds will work for your application, whether it’s turning on a lamp or triggering a shade.
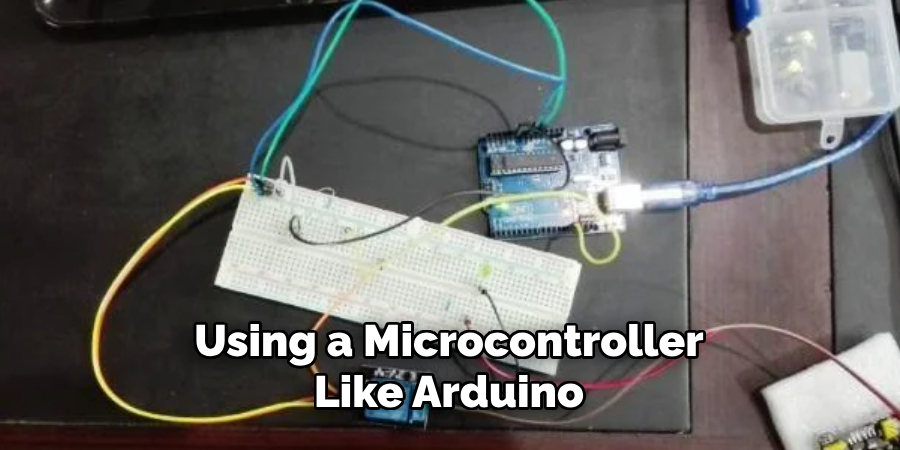
4. Connect the Sensor to a Microcontroller
To make your light sensor actually “do something,” you’ll want to connect it to a microcontroller. Most sensors work with common boards like Arduino, ESP32, or Raspberry Pi. If your sensor is analog, plug the output into an analog pin; if it’s digital, use the appropriate data protocol (e.g., I2C or SPI). Program your board to read the sensor values continuously or at intervals. Once connected, you can use logic in your code to respond to different light levels, such as activating an LED or sending a notification when the light drops below a set threshold.
5. Build a Light-Activated Switch
A classic use of a light sensor is to build a light-activated switch. In this setup, the sensor controls an output device like a relay, motor, or lamp based on ambient light levels. For example, in a nightlight, the circuit turns the light on when it gets dark. Write code that monitors the sensor value and toggles the output pin when the threshold is crossed. This kind of application is practical, intuitive, and perfect for automation around the home, such as in stairway lighting or garden lights that turn on at dusk.
6. Use the Sensor in Solar Tracking Systems
Light sensors are widely used in solar tracking to ensure solar panels face the optimal direction. Place multiple light sensors at different angles around the panel. The system compares light intensities and adjusts the panel’s position to maximize sunlight exposure. This can be achieved with servos or stepper motors controlled by a microcontroller. It’s a more advanced use case, but it greatly improves solar energy efficiency. Light sensors in this context must be calibrated carefully and shielded from environmental noise to ensure accurate sun-tracking performance.
7. Integrate Light Sensors into Smart Devices
In the era of smart homes and IoT, integrating light sensors into devices like thermostats, curtains, or cameras allows them to respond automatically to changing light conditions. For example, a smart curtain could close when the sunlight is too strong to keep the room cool, or a security camera could switch to night mode when light levels drop. These setups often involve combining sensor data with other environmental readings like temperature or motion detection, creating a sophisticated network of responsive technology that makes daily life more convenient and efficient.
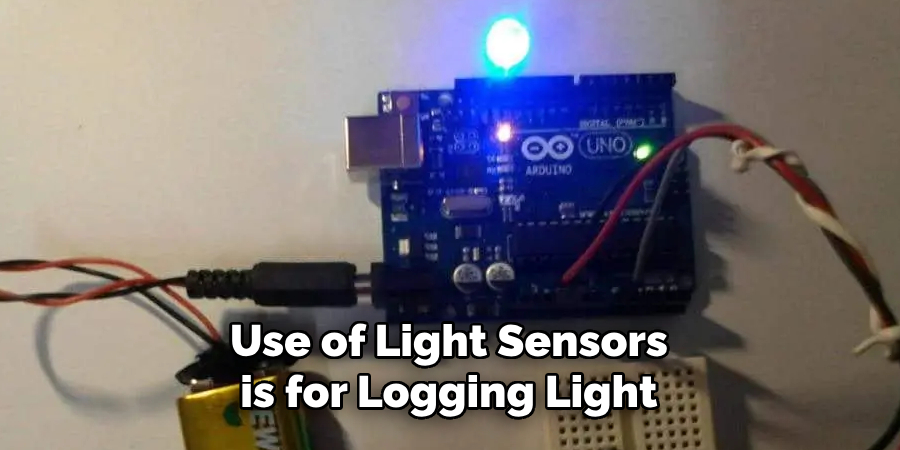
8. Use Light Sensors for Data Logging and Analysis
Another valuable use of light sensors is for logging light conditions over time. Set up your sensor with a microcontroller and data logging module, such as an SD card or an online cloud platform. Record lux values throughout the day to study light patterns in greenhouses, workplaces, or study environments. This data can help optimize lighting setups, improve plant growth, or enhance productivity. With cloud-connected devices, you can even access and analyze the data remotely, turning your light sensor into a powerful research and monitoring tool.
9. Build a DIY Light Meter for Photography
Photographers can use light sensors to build custom light meters. Attach a precise light sensor to an Arduino and calibrate it to show lux levels or exposure values (EV). Display this data on a small screen or transmit it to a smartphone. This DIY solution helps photographers understand the lighting in different settings, aiding in manual camera adjustments. It’s an inexpensive and customizable tool for photography enthusiasts who want greater control over their shooting environment and can be enhanced with other sensors for color temperature or humidity.
10. Incorporate Light Sensors into Wearable Devices
Wearable technology benefits greatly from light sensors. They can be used in smartwatches to adjust screen brightness, track outdoor light exposure, or even help with circadian rhythm regulation. Embedding small digital light sensors into wearable devices requires compact design and power-efficient coding. The sensor can alert users to excessive UV or insufficient daylight exposure, supporting health and wellness routines. Creating such wearables teaches integration skills and introduces advanced concepts like sleep cycles and ambient sensing in personalized tech.
Conclusion
Light sensors are versatile tools with applications ranging from simple hobby projects to advanced automation systems. Whether you’re building a light-activated switch, integrating sensors into smart devices, or logging environmental data, understanding the setup, calibration, and interaction with microcontrollers is essential. These ten methods offer a thorough foundation for using light sensors effectively and creatively. Thanks for reading our blog post on how to use a light sensor! We hope you found it helpful and informative.