

Using a safety harness on a roof is essential for anyone working at heights, ensuring protection from falls and maintaining safety. Whether you’re a roofer, a contractor, or a homeowner undertaking repairs, proper harness use is critical for preventing accidents and injuries. Roof work presents unique challenges due to slopes, varying surfaces, and potential hazards like skylights or edges. Understanding how to use a safety harness correctly involves more than just wearing it—it requires proper anchoring, adjusting straps for a secure fit, and familiarizing oneself with rescue procedures.
This guide will provide comprehensive steps and best practices for how to use a safety harness on a roof, emphasizing safety protocols, equipment selection, and techniques to minimize risks. By following these guidelines, you can ensure a safe working environment and confidently perform tasks while adhering to industry standards and regulations.
Understanding Safety Harness Components
A safety harness is composed of several key components, each crucial for ensuring maximum protection and comfort. The primary elements of a safety harness include:
- Buckles – Used to secure the harness around the body, buckles can be either pass-through, quick-connect, or tongue buckle types. These buckles must be adjusted to fit snugly without restricting movement or causing discomfort.
- D-rings – These metal rings serve as the attachment points for lanyards and lifelines. Typically located on the back, chest, and hips, D-rings are designed to distribute the force of a fall evenly across the body, minimizing injury.
- Webbing – The straps and belts that make up the bulk of the harness, webbing is usually made from high-strength materials like nylon or polyester. This ensures durability and resistance to wear and tear, even in harsh working conditions.
- Padding – Located around the shoulders, back, and thighs, padding provides added comfort and support during extended use. Properly padded harnesses can significantly reduce fatigue and discomfort while working.
- Lanyards and Lifelines – These connect the harness to an anchor point, absorbing shock and limiting fall distance. Lanyards can be single or double-legged, while lifelines can be self-retracting or fixed-length, depending on the job’s requirements.
- Adjusters – These allow for fine-tuning the fit of the harness. Adjusters are typically found on the shoulder and leg straps, ensuring that the harness remains secure and aligned with the user’s body throughout the workday.

By understanding and properly utilizing each component, you can ensure that your safety harness provides optimal protection, reducing the risk of falls and injuries while working on a roof.
10 Methods How to Use a Safety Harness on a Roof
1. Selecting the Appropriate Safety Harness
The first step in using a safety harness on a roof is selecting the appropriate harness for the job. Safety harnesses are available in various designs, each suited to different tasks and environments. Ensure the harness meets the relevant safety standards and is rated for your weight and the type of work you will be performing. Look for harnesses with features like padded shoulder straps, quick-release buckles, and D-rings for attaching lanyards or lifelines. A well-chosen harness will provide comfort, security, and durability, essential for working safely at heights.
2. Inspecting the Harness Before Use
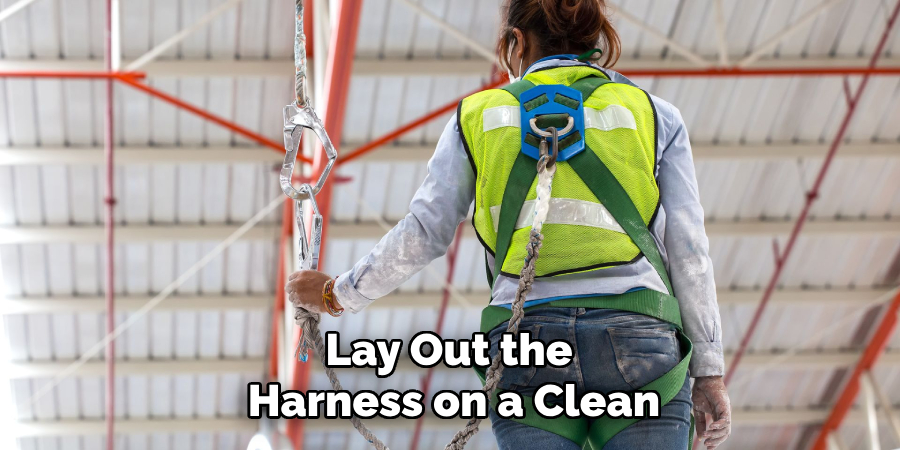
Before using a safety harness, it is crucial to inspect it thoroughly. Lay out the harness on a clean, flat surface and examine each component. Check for frayed or cut webbing, broken stitching, and damage to the buckles and D-rings. Look for any signs of chemical damage or excessive wear. Ensure that all buckles, grommets, and other hardware are present and functional. If any part of the harness appears damaged or defective, do not use it. Replace or repair the harness as necessary to maintain safety.
3. Putting on the Harness Correctly
Correctly putting on the harness is essential for its effectiveness. Start by holding the harness by the D-ring on the back and shaking it to untangle the straps. Slip your arms through the shoulder straps as if putting on a vest. Ensure the D-ring is positioned between your shoulder blades. Fasten the chest strap across your chest, ensuring it sits comfortably. Next, secure the leg straps around your thighs, adjusting them for a snug fit. If your harness has a waist strap, fasten it around your waist. Ensure all straps are adjusted to be snug but not overly tight, allowing for ease of movement.
4. Choosing the Right Anchor Point
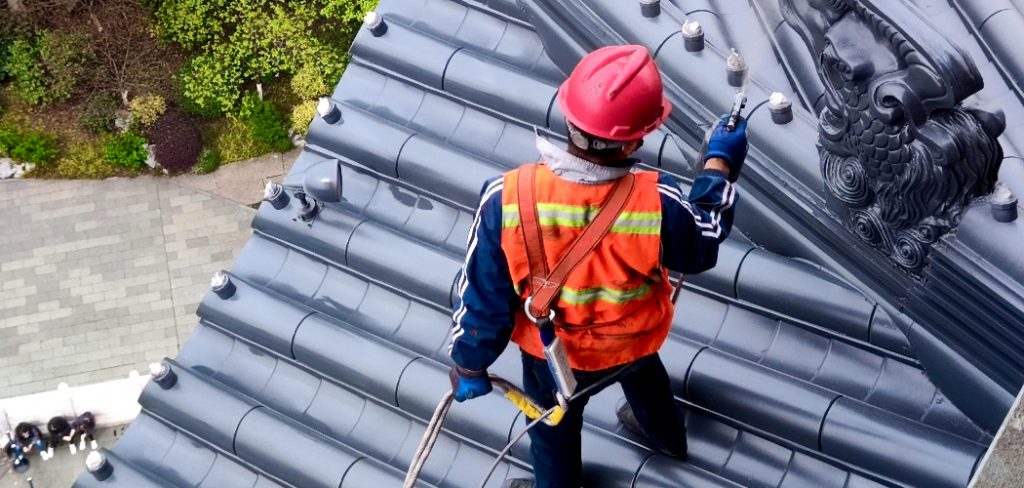
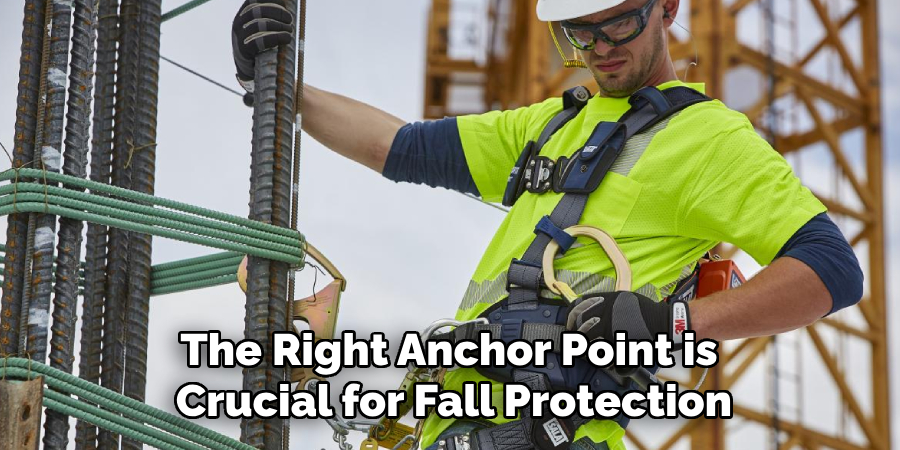
Selecting the right anchor point is crucial for fall protection. The anchor point should be capable of supporting at least 5,000 pounds per person attached. It should be located above the work area to minimize the distance you could fall. Roof anchors can be temporary or permanent, depending on the job. Temporary anchors include roof anchors, beam straps, and reusable anchor points, while permanent anchors are fixed installations. Ensure the anchor point is secure and positioned to allow safe movement across the roof.
5. Securing the Lanyard or Lifeline
Once you have chosen a suitable anchor point, the next step is to secure the lanyard or lifeline. Attach the lanyard’s snap hook or carabiner to the D-ring on the back of your harness. Connect the other end of the lanyard to the anchor point. If using a lifeline, ensure it is properly anchored and free from knots or tangles. The lanyard or lifeline should be long enough to allow movement but short enough to prevent a fall of more than six feet. Double-check all connections to ensure they are secure and properly locked.
6. Positioning Yourself Safely
Proper positioning while working on a roof is essential for preventing falls. Stay aware of your surroundings and avoid working near the edge of the roof whenever possible. Keep your lanyard or lifeline taut to minimize the risk of falling. Use a positioning lanyard if necessary to maintain stability while working with both hands. Always face the ladder or roof edge when ascending or descending, and maintain three points of contact. Proper positioning and movement techniques enhance your safety while working at heights.
7. Utilizing Guardrails and Warning Lines
In addition to using a safety harness, employing guardrails and warning lines can provide extra protection. Guardrails are physical barriers that prevent workers from falling off the roof edge. Install guardrails along the perimeter of the roof and around skylights or other openings. Warning lines are visible markers that alert workers to the proximity of a fall hazard. These lines should be positioned at least six feet from the roof edge. Combining guardrails and warning lines with a safety harness system provides a multi-layered approach to fall protection.
8. Conducting Regular Safety Checks
Regular safety checks are crucial for maintaining the effectiveness of your fall protection system. Before starting work, perform a thorough inspection of your harness, lanyard, and anchor points. Check for any signs of wear, damage, or improper installation. Ensure that all connections are secure and properly locked. Throughout the day, periodically check your equipment to ensure it remains in good condition. Regular safety checks help to identify potential hazards and ensure that your fall protection system is always ready to perform.
9. Understanding Emergency Procedures
Understanding emergency procedures is essential for responding effectively to a fall. Ensure you and your coworkers are familiar with the rescue plan and know how to use the rescue equipment. Rescue procedures should include steps for contacting emergency services, safely reaching the fallen worker, and administering first aid if necessary. Practice emergency drills regularly to ensure everyone knows their role in the event of a fall. A well-prepared team can respond quickly and efficiently to minimize the impact of a fall.
10. Training and Competency
Proper training is the foundation of effective fall protection. Ensure that all workers who will be using safety harnesses are trained in their correct use, inspection, and maintenance. Training should cover the selection and installation of anchor points, proper donning of harnesses, use of lanyards and lifelines, and emergency procedures. Regular refresher training helps to maintain competency and stay updated on the latest safety practices. Competent and confident workers are better equipped to use safety harnesses effectively and respond appropriately in emergency situations.

Conclusion
In conclusion, using a safety harness on a roof involves several crucial steps that ensure your protection while working at heights. From selecting the appropriate harness and inspecting it before use to choosing the right anchor point and understanding emergency procedures, each method plays a vital role in fall protection. Proper training and regular safety checks further enhance the effectiveness of your fall protection system.
By understanding and applying these detailed methods, you can ensure your safety and the safety of your coworkers while working on a roof. Now that you know how to use a safety harness on a roof. While it does take a few steps each time, hopefully now you understand the process and why it’s worth taking the extra step to make sure your floor is properly cared for. So don’t wait any longer, take action today!
About
Safety Fic is a distinguished figure in the world of Diy design, with a decade of expertise creating innovative and sustainable Diy solutions. His professional focus lies in merging traditional craftsmanship with modern manufacturing techniques, fostering designs that are both practical and environmentally conscious. As the author of diy, Safety Fic delves into the art and science of Safety Fic-making, inspiring artisans and industry professionals alike.
Education RMIT University
(Melbourne, Australia) Associate Degree in Design (Safety Fic) Focus on sustainable design, industry-driven projects, and practical craftsmanship. Gained hands-on experience with traditional and digital manufacturing tools, such as CAD and CNC software.
Nottingham Trent University
(United Kingdom) Bachelor’s in diyfastly.com and Product Design (Honors) Specialized in product design with a focus on blending creativity with production techniques. Participated in industry projects, working with companies like John Lewis and Vitsoe to gain real-world insights.
Publications and Impact
In diy, Safety Fic his insights on indoor design processes, materials, and strategies for efficient production. His writing bridges the gap between artisan knowledge and modern industry needs, making it a must-read for both budding designers and seasoned professionals.