

Are you planning on installing an occupancy sensor in your home or office? Occupancy or motion sensors are energy-saving devices that automatically turn lights on when someone enters a room and turn them off when no one is present.
How to wire occupancy sensor is a practical and effective way to enhance energy efficiency and convenience in your space. Occupancy sensors detect motion or changes in room occupancy and automatically control lighting or devices, ensuring they only operate when needed. This can help reduce energy wastage, lower utility bills, and extend the lifespan of your lighting fixtures. While wiring an occupancy sensor might initially seem complex, it can be done safely and efficiently with the right tools and guidance.
This guide will walk you through the steps to wire an occupancy sensor, ensuring proper functionality and safety in your home or office.
What Are the Benefits of Wiring an Occupancy Sensor?
Before we dive into the steps of wiring an occupancy sensor, let’s look at why it’s beneficial to do so.
- Energy Efficiency: As mentioned earlier, occupancy sensors can help reduce energy wastage by automatically turning off lights and devices when they’re not in use.
- Cost Savings: Lowering your electricity usage can save money on utility bills.
- Convenience: With an occupancy sensor, you no longer need to worry about manually turning off lights or devices. It will be done automatically for you.
- Extended Lifespan of Lighting Fixtures: By reducing the time that lights are on, their lifespan is extended, saving you money on replacement costs.
- Enhanced Security: Occupancy sensors can also help improve security by automatically turning on lights when someone enters a room, making it seem like someone is home even when they’re not.
What Material Will You Need?
To install occupancy sensors, you will need the following materials:
- Occupancy sensor(s)
- Electrical wiring and connectors
- Screwdriver and/or power drill
- Wire cutters/strippers
- Circuit tester or multimeter (for safety purposes)
- Ladder (if installing high on walls or ceilings)
It is also recommended to have a basic understanding of electrical wiring and safety precautions before installing an occupancy sensor.
8 Easy Steps on How to Wire Occupancy Sensor
Step 1: Turn Off the Power
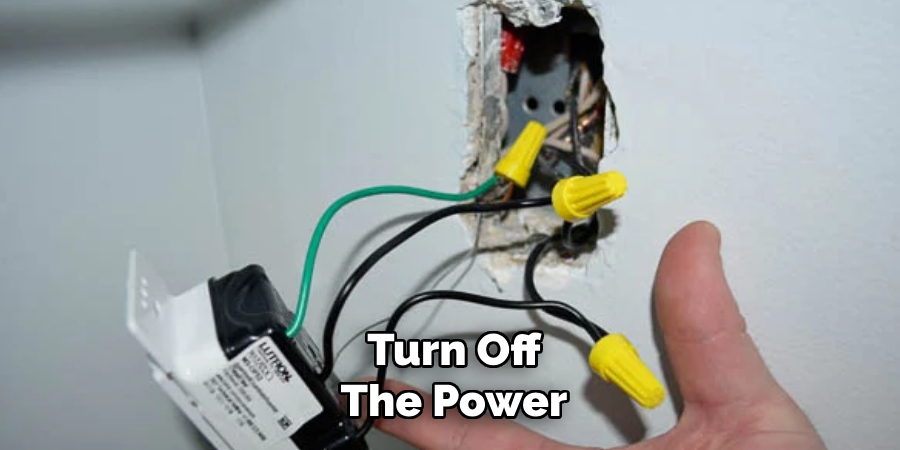
Before starting any electrical work, it is critical to prioritize safety. Locate the circuit breaker that controls the power supply to the area where you will be installing the occupancy sensor. Switch the breaker to the “off” position to cut off electricity to the circuit. After doing so, use a circuit tester or multimeter to confirm that no power flows to the wires you’ll be handling. This step ensures you reduce the risk of electrical shock or damage to the components. Double-check the tester’s readings to ensure no power remains active before proceeding.
Step 2: Remove the Existing Switch or Cover Plate
Once you’ve confirmed that the power is turned off, carefully remove the existing switch or cover plate from the wall. Use a screwdriver to unscrew the mounting screws holding the plate in place. After removing the cover, gently pull the switch or device out of the electrical box to expose the connected wires. Note how the cables are connected; you must replicate or modify this arrangement when installing the occupancy sensor. If necessary, take a photo for future reference to ensure proper reassembly.
Step 3: Connect the Wires
Identify the wires on the occupancy sensor and match them to the corresponding wires from the electrical box, typically color-coded. Use wire connectors to securely join the cables, ensuring a tight connection. If the wires from the sensor do not match exactly, refer to the manufacturer’s instructions to identify the correct configuration. Double-check all the connections to ensure they are secure and there are no exposed wires.
Step 4: Mount the Sensor
Carefully position the occupancy sensor in its designated location on the wall or ceiling. Align the mounting holes of the sensor with those on the electrical box or the bracket provided. Use the screws included in the packaging to securely fasten the sensor in place, ensuring it does not wobble or shift.
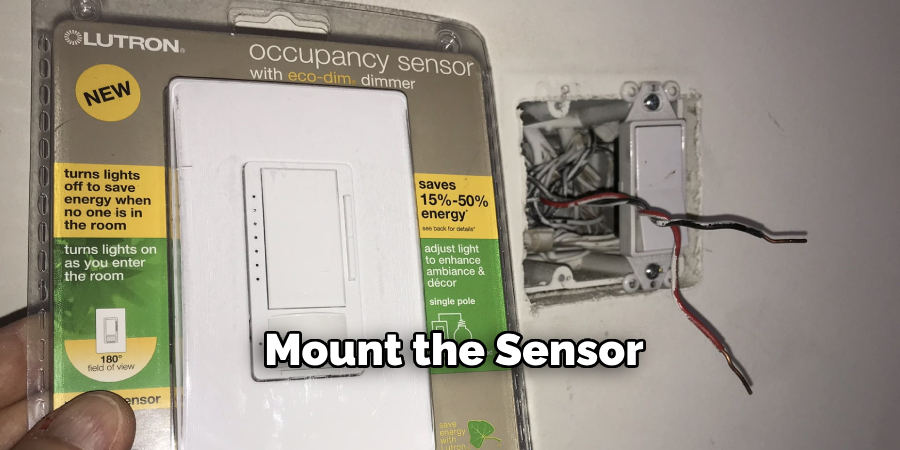
Ensure the sensor’s lens has an unobstructed view of the area it is intended to monitor for optimal performance. If applicable, adjust the angle or direction of the sensor to maximize coverage. Once mounted, double-check that the wiring remains secure and that the sensor is firmly attached. Refer to the manufacturer’s instructions for any specific mounting requirements or additional adjustments.
Step 5: Testing the Sensor
After the sensor has been securely mounted, proceed to test its functionality. Power on the device and verify that it receives a stable power supply. Trigger the sensor by simulating movement or the appropriate activity to detect and observe the system’s response.
Ensure the sensor accurately detects and responds without delays or errors. If the performance is not as expected, consult the troubleshooting section of the manufacturer’s guide to make the necessary calibrations or adjustments. Repeat the test until the desired level of performance is achieved.
Step 6: Validate System Integration
After verifying the individual performance of the sensor, proceed to validate its integration with the overall system. Check that the sensor communicates appropriately with other connected components, such as controllers or data processing units.
Monitor the data flow to ensure accuracy, consistency, and responsiveness. Reviewing the system’s configuration or consulting the technical documentation should address any discrepancies or anomalies. Conduct multiple tests under various conditions to confirm reliable operation across different scenarios.
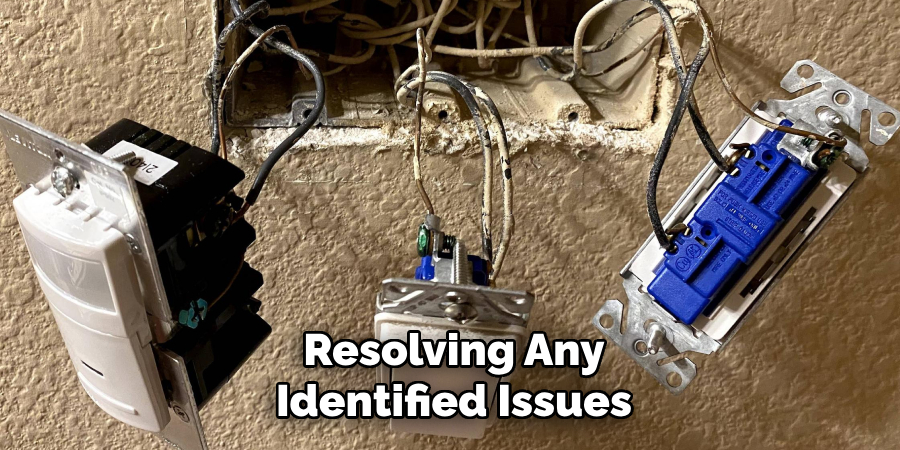
Step 7: Final Validation and Deployment
After completing the initial tests and resolving any identified issues, perform a final validation to ensure the system’s readiness for deployment. Verify that all components operate harmoniously and that the sensor meets the performance benchmarks required for its intended application.
Document the final validation process results and obtain the necessary approvals before proceeding with the deployment. Once validated, integrate the sensor into the live environment and monitor its performance closely during the initial phase to address any unforeseen challenges promptly.
Step 8: System Configuration and Calibration
Begin by configuring the system to align with the operational requirements. Ensure the sensor is calibrated accurately by following the manufacturer’s guidelines or standard calibration procedures. This step is critical to achieving optimal performance and avoiding potential discrepancies during deployment. Record the calibration settings and confirm that they align with the predefined benchmarks to maintain consistency throughout the operation phase.
By following proper configuration and calibration procedures, you can guarantee accurate and reliable data collection throughout the sensor’s lifespan.
5 Things You Should Avoid
- Ignoring the Manufacturer’s Instructions
Skipping over the manufacturer’s guidelines can lead to improper wiring and functionality issues. Always read and follow the provided documentation to ensure compatibility and correct installation.
- Using Incorrect Power Supplies
Connecting the sensor to an incompatible voltage or power supply can damage the device and pose safety hazards. Double-check the power requirements and match them accordingly.
- Not Turning Off Power During Installation
Working on live circuits is dangerous and can lead to severe electrical shocks or damage to the sensor. Always turn off the power at the source before beginning any wiring.

- Improper Grounding
Failing to correctly ground the occupancy sensor can result in unreliable operation or electrical faults. Ensure that grounding connections are secure as per the manufacturer’s recommendations.
- Overcomplicating the Wiring Process
Adding unnecessary components or connections not specified in the instructions can create confusion and reduce the sensor’s efficiency. Keep the wiring straightforward, following the prescribed wiring diagram for your specific setup.
Is Occupancy Sensor Same as Motion Sensor?
Occupancy and motion sensors are often used interchangeably but have some key differences. While both types of sensors detect movement, occupancy sensors are designed to detect the presence of people in a defined area. At the same time, motion sensors can also pick up movement from another source, such as pets or cars passing by.
Understanding the distinction between these two types of sensors is essential to ensure you choose the right one for your specific needs. For example, an occupancy sensor would be more suitable for controlling lights in a room or hallway where people may be present at different times throughout the day. On the other hand, a motion sensor may be better suited for outdoor security purposes.
Conclusion
Properly wiring an occupancy sensor is key to ensuring its optimal functionality and long-term reliability.
You can ensure a seamless installation process by carefully following the manufacturer’s guidelines, checking for compatibility with your electrical system, and avoiding common mistakes such as improper grounding or overcomplicated wiring. Reviewing wiring diagrams and double-checking connections will minimize potential issues and maximize the sensor’s performance. A well-installed occupancy sensor enhances energy efficiency and contributes to a safer and more convenient environment.
Hopefully, the article on how to wire occupancy sensor has provided you with a comprehensive understanding of the process.